![Nextcloud - private cloud for files [ENG 🇬🇧]](/images/nextcloud.png)
🇵🇱 Przejdź do polskiej wersji tego wpisu / Go to polish version of this post
Table of contents:
- Running it on YunoHost
- Running as a Docker container
- Results of the work
- Nextcloud Applications - Connecting Devices
Dropbox, OneDrive, Google Drive, iCloud, MEGA, Backblaze are probably the most popular solutions for storing files in the so-called cloud. It must be admitted that this form of aggregation and access to one’s data is very convenient and also serves as a kind of backup. All of the mentioned services offer more or less disk space in free packages, but to store larger amounts of data, we need to consider purchasing one of the paid plans, which may not be cost-effective, especially when dealing with a large number of photos. Another, crucial disadvantage of such a solution is the necessity to entrust our data to third parties, or even worse, corporations. So what can we do? Launch our own “cloud” for data, and the best solution for this is Nextcloud! It is a tool that is now described as a collaboration platform because it consists of not one, but many tools. As a few examples, we can list:
-
Files - network drive,
-
Photos - photo gallery,
-
Talk - video/audio chat,
-
Groupware - calendar organization, contacts, and mail,
-
Office - office suite.
However, it all started with Nextcloud being simply an open-source software designed to run on your own network-attached storage server.
In this post, I will show you how to run such a platform for yourself. I will offer two options:
Running it on YunoHost
The installation process will be similar to the one described in my post about WriteFreely, but in the case of running NC, we don’t need a separate domain. In fact, if you’re only running it for yourself, creating a special domain isn’t recommended because, firstly, it’s just an additional cost, and secondly, it’s better not to reveal all your cards and thus expose your data by using a subdomain like nextcloud.tomaszdunia.pl, which would clearly indicate that all our data is located at that address. I generally prefer to keep such services in the local network, which can only be accessed through a VPN such as WireGuard, but that’s a topic for a completely different post.
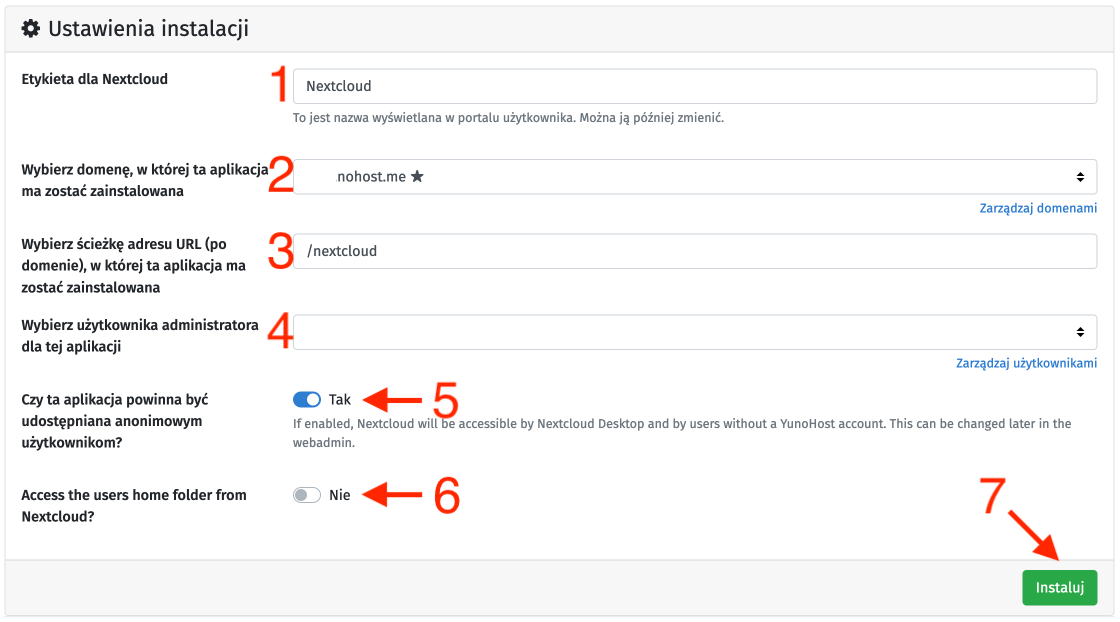
We start by logging into our YunoHost administrator panel and immediately go to Applications. Then, in the top right corner, click the green + Install button, search for the Nextcloud application and select it from the list. Scroll down to the Installation settings section and start configuring:
-
In the text field named Label for Nextcloud [1], enter the name under which you want to see this application in the list of applications in your YunoHost.
-
From the dropdown list below [2], choose on which domain you want to install NC. As you can see, I chose the main domain on which my YunoHost is running. You can do the same or choose a different domain from the list.
-
In the next text field [3], define the exact path under which NC should be installed. By providing the value (as default) of /nextcloud, NC will be installed at example.domain.com/nextcloud, where of course example.domain.com is the domain you selected above. If you have decided to attach a domain dedicated only to NC, you can only enter / here, which will mean installing NC in the parent directory of the domain.
-
The next dropdown list [4] is used to indicate which YunoHost user should be the administrator for this application, and thus its first user.
-
Next, we have two decision fields, the first of which [5] is the question Should this application be made available to anonymous users?. Here, I suggest choosing Yes, as otherwise Nextcloud clients (referring to Nextcloud Desktop, which is used to access NC on end-user devices) will not work, as an additional authentication step will appear, requiring logging into YunoHost, which is not provided for.
-
The second dropdown [6] is the question of whether we want to give Nextcloud access to the /home folder on our server. Personally, I don’t see the need for this, and it’s definitely a risky business, because if you choose Yes, NC will gain access to other applications running on YunoHost. Everyone will decide for themselves, as everything depends on the specific application. However, I leave the No option selected.
-
We confirm the above settings with the Install button [7], and thus start the installation process, which unfortunately is not the shortest, so you need to be patient.
After the installation is complete, we will be redirected to the YunoHost applications list, where Nextcloud will appear as a new item. To access NC, we can select it from the list and use the Open this application button or simply enter the path defined during the above configuration into the browser’s address bar.
Running as a Docker container
Don’t have a YunoHost server? No problem! You can do the same thing using Docker! I recommend first reading my post on Docker - one server, many services.
We start by creating a directory for this container:
mkdir -p /home/$USER/docker/nextcloud
Next, we create a configuration file for this container:
nano /home/$USER/docker/nextcloud/docker-compose.yml
Nextcloud as a Docker container can be configured in many different ways, especially with regard to the database that we choose for it. We can choose, for example, MySQL/MariaDB or PostgreSQL. However, the default solution is to use SQLite, which we will use in this post, as it significantly simplifies the configuration process and is perfect for this guide, which aims to show only the basic configuration of Nextcloud, without going into details. In this case, the docker_compose.yml configuration file created by us should be filled with the following content:
version: "3"

services:
  nextcloud:
    container_name: nextcloud
    image: nextcloud:latest
    ports:
      - "80:80"
      - "443:443"
    environment:
      PUID: '1000'
      PGID: '1000'
      TZ: 'Europe/Warsaw'
    volumes:
      - '/home/$USER/docker/nextcloud/volumes/var/www/html:/var/www/html'
    restart: unless-stopped
In the above code, the only new elements can be the environment variables PUID and PGID. These variables inform the container how to write its data, specifically, who to set as the owner of these files. PUID corresponds to the user identifier, and PGID corresponds to the group identifier to which this user belongs, and to which other users who are to have access to these files may also belong. These identifiers for your user can be set using the command:
id $USER
In response, you will get something similar to:
uid=1000(dockeruser) gid=1000(dockergroup) groups=1000(dockergroup)
The value given as uid and gid is exactly what should be entered in the docker_compose.yml configuration file as PUID and PGID, respectively. We can now save the constructed configuration file and exit from it.
At this point, we still need to create the appropriate volume that we declared as the place to store the container’s data:
mkdir -p /home/$USER/docker/nextcloud/volumes/var/www/html
Let’s also check whether the ports for handling this container are open in our firewall:
sudo ufw allow 80
sudo ufw allow 443
Finally, all that remains is to compile and run the Nextcloud container:
docker-compose -f /home/$USER/docker/nextcloud/docker-compose.yml up -d
You can additionally verify the correct operation of the container using the command:
docker ps
If everything is okay, we can now go to the browser and enter the IP address of our server under which the freshly launched Nextcloud should be running. On the welcome page, we still need to complete the configuration by creating an administrator account and choosing the database type as SQLite. We confirm everything with the Install button and we’re done.
Results of the work
After following any of the above instructions, the resulting welcome screen should look like this (or similar):
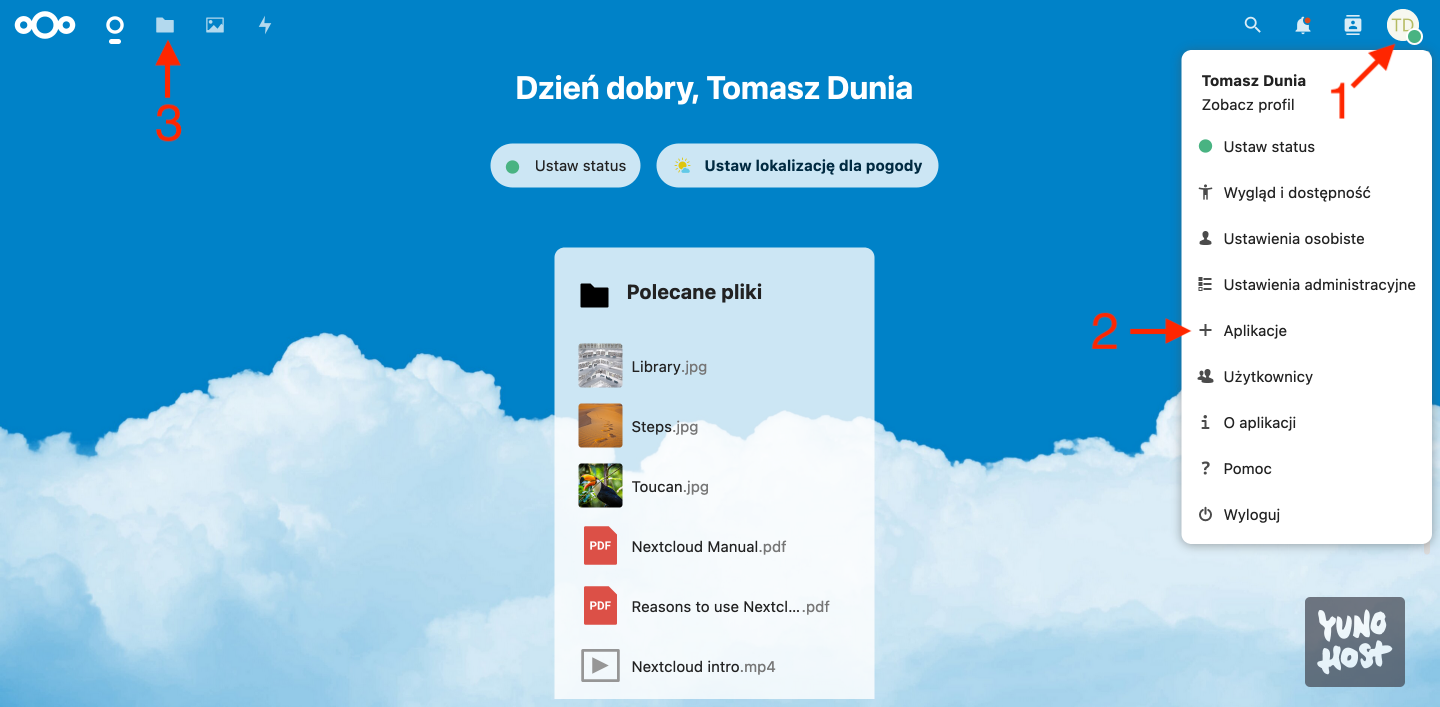
As you can see at first glance, Nextcloud is a very user-friendly, clean, and intuitive interface. I won’t go into detail about the capabilities of this environment here, but I recommend going to the application installation and management tool (the user icon in the upper right corner [1] and select Apps from the list [2]). Please note how many possibilities are now available in the Nextcloud library!
What I always do after the first launch of Nextcloud is go to the Files tool [3] and clear everything inside. However, these are demo materials showing basic functionalities that may be useful to new users, so I recommend checking them out. Then of course you can delete them and plan your disk space your own way.
It is also important not to forget to enable two-factor authentication during login. A clear instruction on how to do this can be found in the Nextcloud documentation, so I won’t repeat that information here.
Nextcloud Applications - Connecting Devices
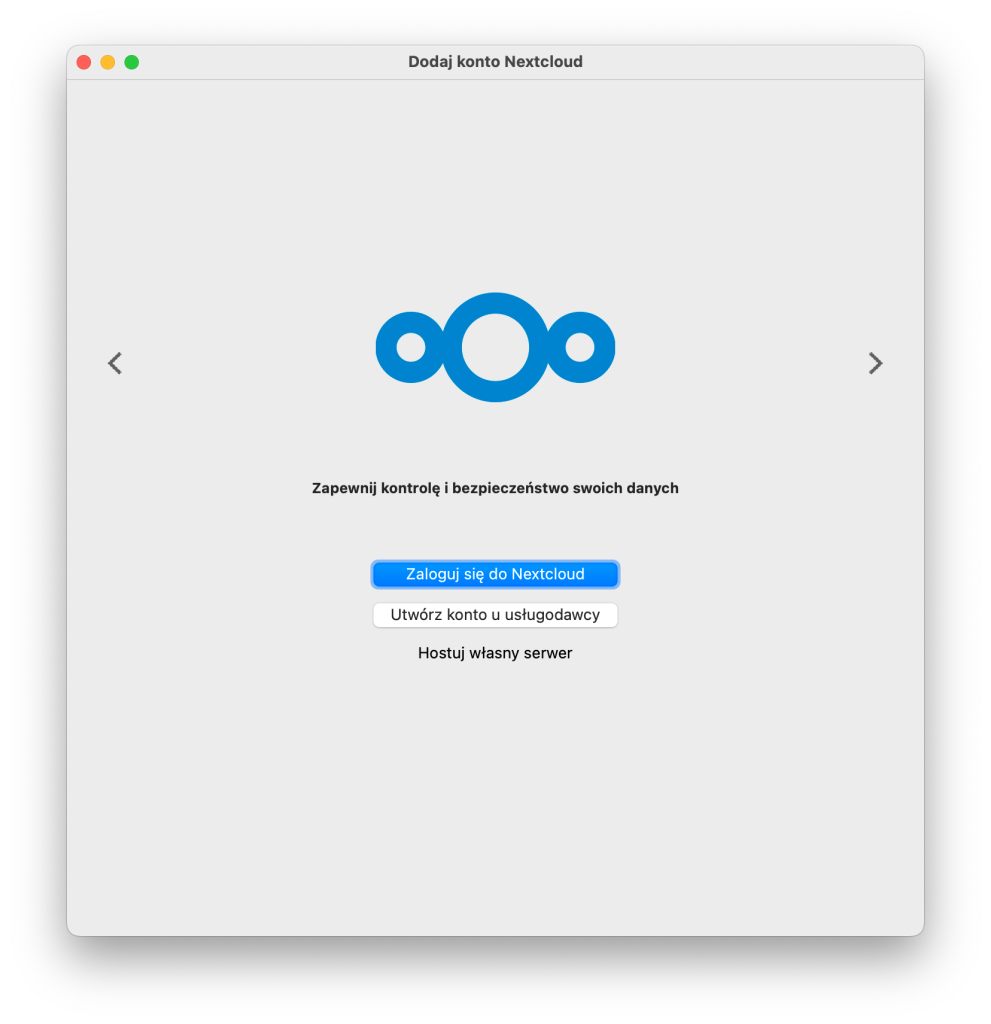
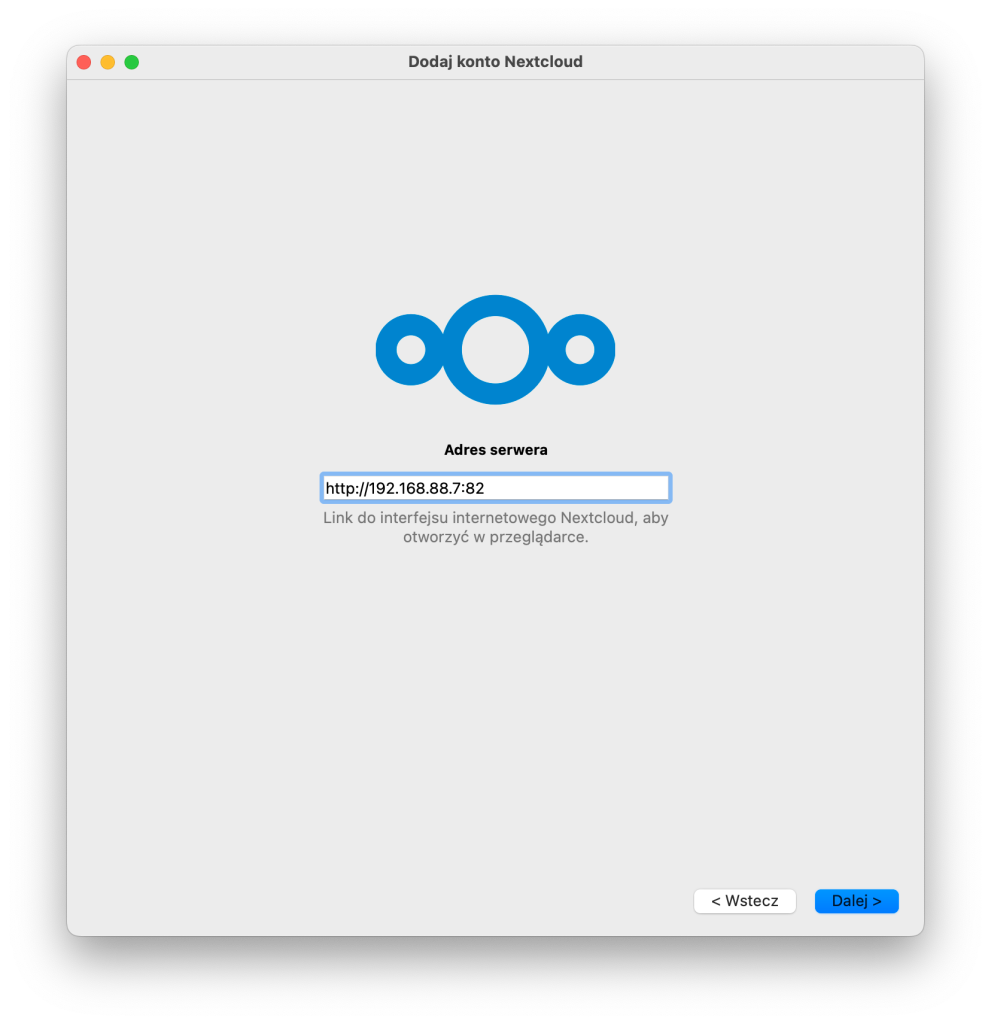
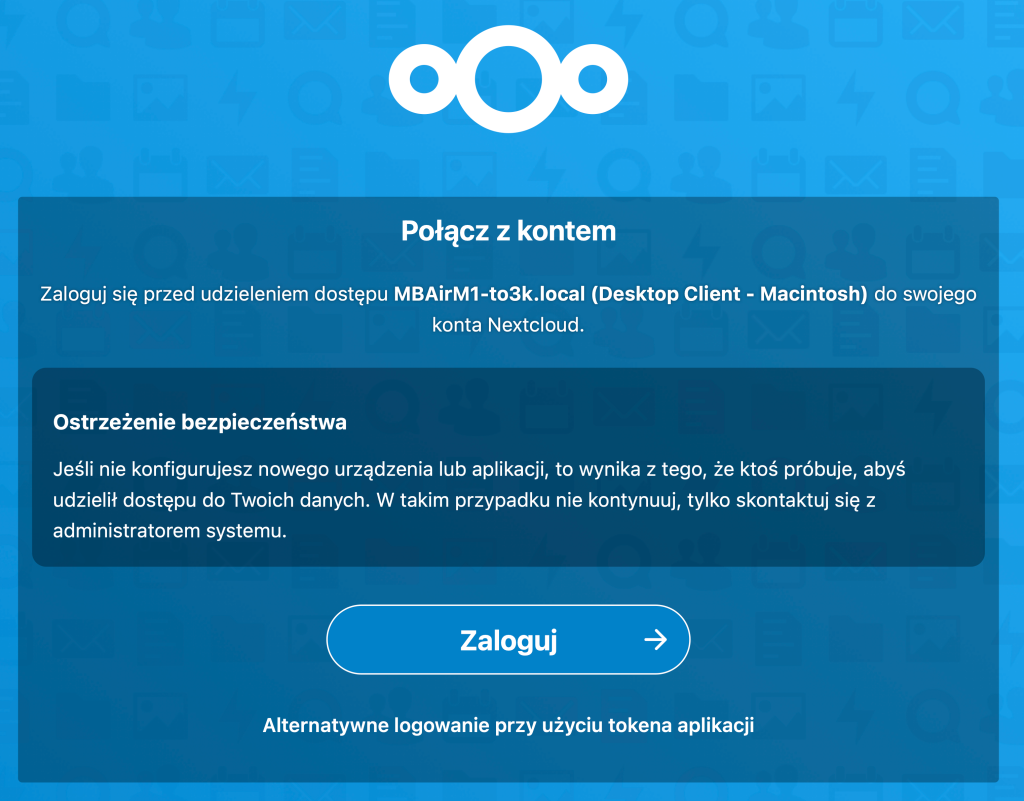
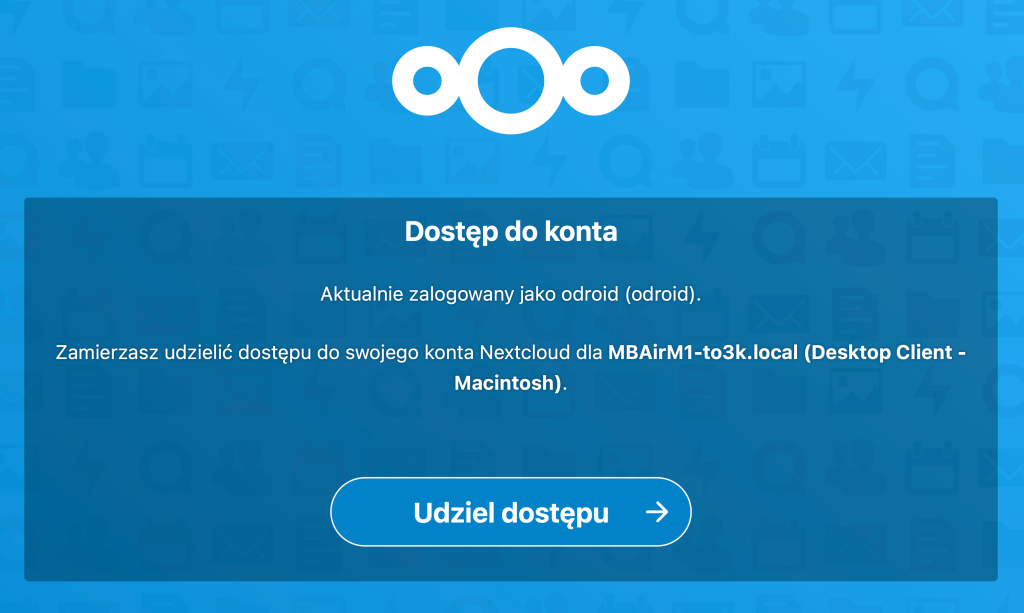
Dedicated Nextcloud applications are available for Windows, Linux, macOS, Android, and iOS. All of them can be accessed through this link. Installation on each system is identical, so I will demonstrate the entire process on macOS. After installing the appropriate application, we launch it and on start-up, we are presented with a window where we select the Log in to Nextcloud button. In the next window, we are asked to enter the server address, so we provide it and confirm with the Next > button.
We will be redirected to the browser, where we need to authenticate the new client.
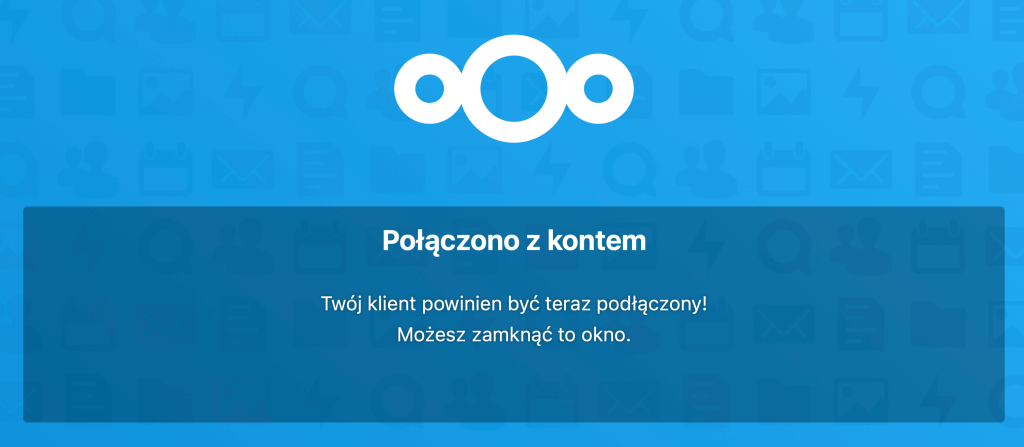
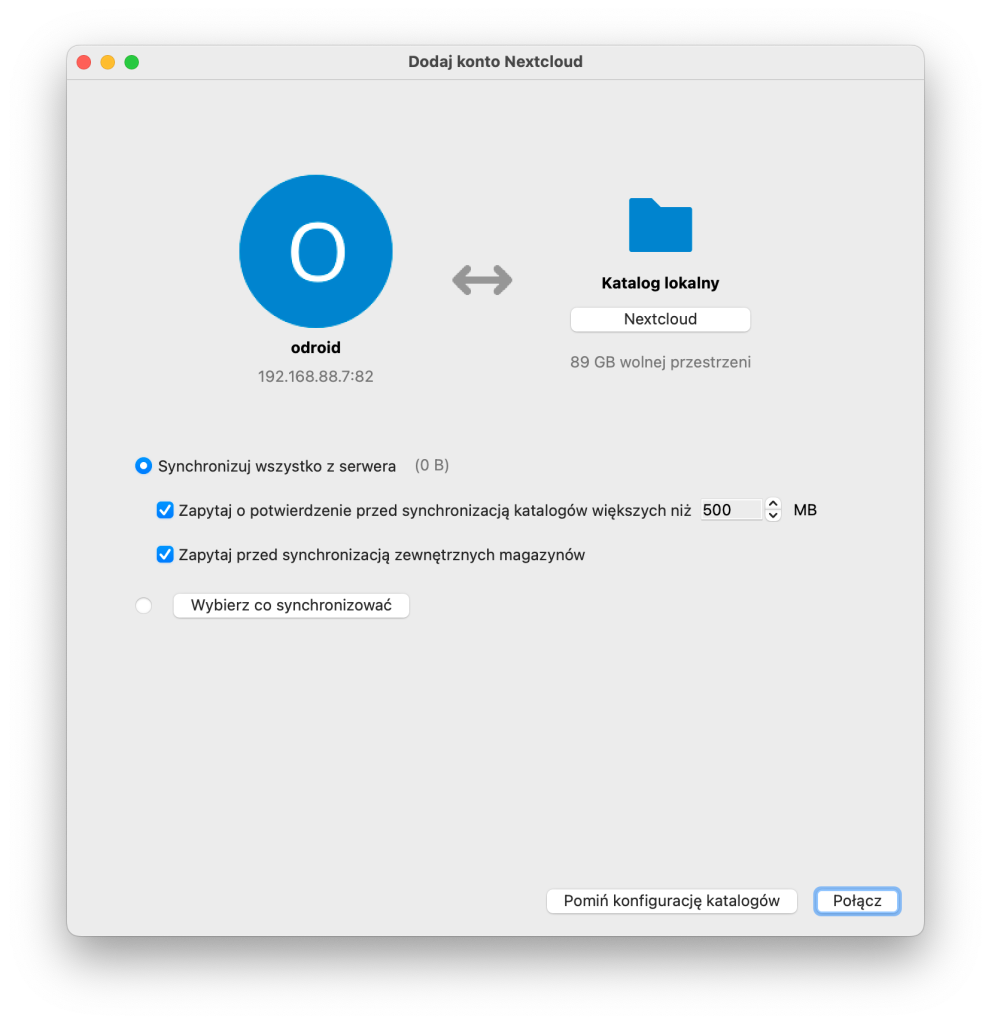
Finally, we return to the freshly installed Nextcloud application, where we still need to perform the basic client configuration. We provide the folder in the local computer memory to which Nextcloud should be connected. The rest can be changed according to ones preferences. Finally, we confirm by clicking the Connect button and that’s it. This configured client will update our files in real time, which means that when we modify, add, or delete a file on any device, these changes will be reflected on the server in a moment, and then on other connected devices.


