![BiLangPost - tool for publishing bilingual posts [ENG 🇬🇧]](/images/bilangpost.png)
🇵🇱 Przejdź do polskiej wersji tego wpisu / Go to polish version of this post
Table of contents:
BiLangPost is my next small and not very complicated project (you know how much I love such things 😉). It is a tool that facilitates writing bilingual posts. The reason for its creation is that when I joined Mastodon, I decided to write in both Polish and English there. I am quite fluent in spoken and written English, but I am also a fan of automating everything that can be automated. With translations, it is always better to improve an imperfect translation than to write something twice (first in one language, then in the other). Considering the above, I thought it over, sat down at the code editor, and created the aforementioned tool using the PHP language.

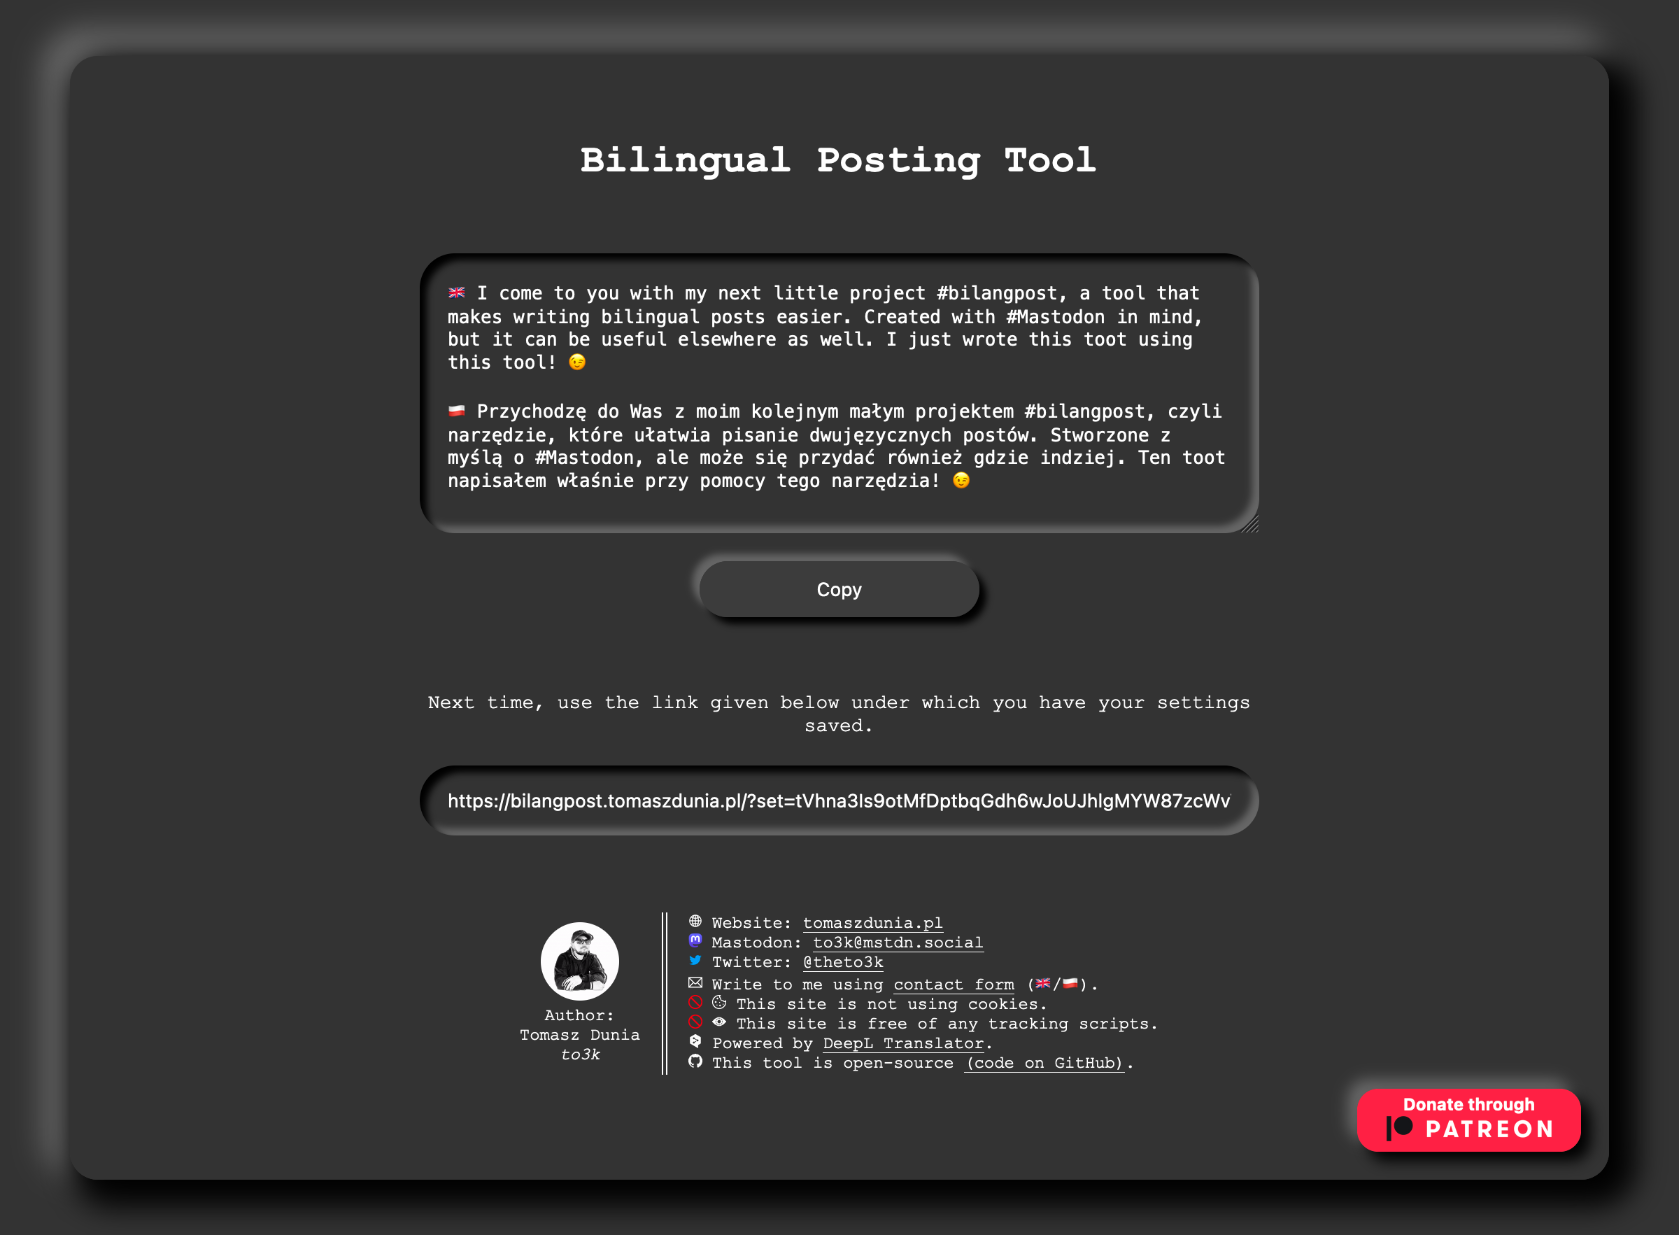
The operation principle is as follows: we write a message in the source language and indicate the target language. Then, BiLangPost translates the content from the source message to the target language and combines them, additionally formatting it to create a ready-to-publish post (or toot) on social media, for example. The underlying translation mechanism is powered by DeepL, with which I communicate using API, as described in this post. Speaking of the DeepL API, as you probably know from the linked article, it’s free up to a certain limit. After exceeding that limit, a paid plan comes into play, which unfortunately is not among the cheapest. Consequently, I couldn’t share my private API token for use with this free tool, as my limit would be quickly exhausted, and the free package is sufficient for my personal needs. Therefore, anyone who wants to use BiLangPost must use their own API key. Of course, the key provided by the user is not stored or used by me in any other way than to perform the work of BiLangPost assigned to it in a given session.
Let’s Take a Look at the Code
The entire code is, of course, open and available for review on GitHub. The substantive part related to the translation, i.e., how to properly communicate with the DeepL API, was already described on the blog, so I won’t repeat that here. However, there is one thing in the BiLangPost code that I’d like to discuss. It’s a mechanism I created so that users wouldn’t have to manually enter their API token and select translation languages each time, without using cookies and/or sessions. I came up with a solution where I take a variable that stores the user’s provided API token and variables that specify the chosen source and target languages, then I combine them into one variable separated by semicolons. Next, I encrypt the value of this variable using the openssl_encrypt() function and store it as a global variable of type $_GET (the one stored in the URL). This way, the user can use this special URL on their next visit, containing the embedded variable with the necessary information, without having to configure everything from scratch. It’s a solution that is both convenient and relatively secure because the user’s API token is not exposed as plaintext in the URL.
The previously mentioned openssl_encrypt() function has three main parameters:
-
$data - the data to be encrypted,
-
$cipher_algo - declaration of the encryption algorithm to be used (I chose AES-128-CTR),
-
$passphrase - encryption key, without which decryption is not possible.
The encrypted value can be decrypted using the complementary openssl_decrypt() function, which takes analogous parameters.
<?php
    // Variables necessary for encryption process
    $passphrase = "[encryption key for encrypting GET variable with settings]";
    $cipher_algo = "AES-128-CTR";
    // Declaration of a variable to store settings
    $settings = "";
    [...]
?>

<!-- HTML Form -->
<form action="/?set=<?php echo $set; ?>" method="post">
    [...]
    <button type="submit" name="PreparePost" value="PreparePost">Prepare post!</button>
</form>

<?php
    [...]
    // If HTML form has been submitted
    if(isset($_POST['PreparePost']))
    {
        // Encryption process
        $settings = $token.";".$lang1.";".$lang2;
        $set = openssl_encrypt($settings, $cipher_algo, $passphrase);
    }
    [...]
    // If global variable (GET) set is not empty
    if(!empty($_GET['set']))
    {
        // Decryption process
        $set = addslashes(strip_tags($_GET['set']));
        $decrypted_set = openssl_decrypt($set, $cipher_algo, $passphrase);
        $explode = explode(";", $decrypted_set);
        $token = $explode[0];
        $lang1 = $explode[1];
        $lang2 = $explode[2];
    }
    [...]
?>
Text Area Handling
Front-end has never been my strong suit, and it’s a bit embarrassing to admit, but I am completely unfamiliar with the Javascript language. In the realm of HTML, PHP, or even MySQL, I navigate without much difficulty, but JS has always been a big question mark for me. Somehow, I never had the time to sit down and familiarize myself with it. It’s often a significant problem for me because it’s undeniable that 99% of the Internet is built on Javascript. Whenever I need to implement something written in JS on one of my pages, I simply search for similar ready-made solutions that I modify to suit my needs. The same was for BiLangPost, where I needed to learn how to handle text areas, specifically to accomplish three things:
-
to dynamically expand the text area when the entered text no longer fits within it,
-
to count the number of characters entered in the text area so that the user can see in real-time if they are within the character limit they set for themselves,
-
to add a button that allows one-click copying of the entire content of the text area.
The base HTML code for modification:
<textarea
    id="textarea"
    name="message"
    placeholder="Write here in your native language..."
>[Content]</textarea>

<button type="button" name="CopyButton">Copy</button>
To handle the issue of a self-scaling area (resizing beyond the default size), you can do it quite easily by adding a parameter to the _
<textarea [...] oninput='this.style.height = "";this.style.height = this.scrollHeight + "px"'></textarea>
If I understand the notation correctly, it simply means that the height parameter of the text area is dynamically updated while entering successive characters into the area, overwritten with a value equal to the scrollbar’s height.
For counting the number of characters inside the area, I created a function that initializes a variable called counter, in which the current length of the string entered inside the designated text area is saved. Calling this function occurs through an event named onKeyUp, which, in simple words, means “when a keyboard button is released.” This event occurs when we press a key on the keyboard and release it (precisely at the moment of release). Finally, we need to display the calculated value below the text area.
<textarea onKeyUp="count_it()" [...]></textarea>

<div>Characters: <span id="counter"></span></div>

<script>
    function count_it()
    {
        document.getElementById('counter').innerHTML = document.getElementById('textarea').value.length;
    }
    count_it();
</script>
Finally, we have a button left for copying the content of the text area with a single click. The script handling this functionality consists of a function where we first define the specific text area by its identifier (Id). Then, the content of the area is selected, and with the next command, the selected content is copied to the user’s clipboard. At the end of the function, there is an additional bonus in the form of changing the text inside the button (label) after it is clicked. The text Copy changes to Copied!. After finishing the script, remember to add the id and onclick parameters to the button. The latter informs the interpreter about what should happen when the button is clicked, in this case, the copy() function we previously wrote should be called.
<button [...] id="CopyButton" onclick="copy()">Copy</button>

<script>
    function copy()
    {
        let textarea = document.getElementById("textarea");
        textarea.select();
        document.execCommand("copy");
        var btn = document.getElementById("CopyButton");
        btn.innerHTML = "Copied!";
    }
</script>
BiLangPost is waiting to serve
At the end of this post, I just wanted to invite you once again to the dedicated website of the BiPangPost tool!
> https://bilangpost.tomaszdunia.pl <
A sample toot written using BiLangPost looks like this:


