![Terminal with Proxmox - creating VM [ENG 🇬🇧]](/images/proxmox_vms.png)
🇵🇱 Przejdź do polskiej wersji tego wpisu / Go to polish version of this post
Table of contents:
This is a continuation of the previous post in which I presented a tool called Proxmox, which is a virtualization environment. I discussed its installation on a terminal, which is a type of mini PC. Below, I will describe how to create your first virtual machine (VM) in Proxmox.
Creating virtual machines
When you enter the Proxmox management panel, you will be greeted with a login window. Use the root login and the password that you provided during installation. Next, you will see another popup, this time informing you that you do not have a subscription. Proxmox is an open-source solution, but it also has optional paid subscriptions. As an ordinary private user, simply click OK to close the popup. Unfortunately, you will have to do this every time you log in, which can be a bit annoying.
Getting to the point, I would like to note at the beginning that I do not plan to discuss all of the settings, as it might take me a lifetime. I will only focus on showing you how to start your first virtual machine. First, we need to download the ISO image of the system that we want to install on this machine. One such system could be Ubuntu Server 22.04 LTS, which can be downloaded from the official distribution site. Image can be uploaded to Proxmox in two ways. The first is to download the image to your computer first and then upload it to the server, and the second is to point the server to the image link and download it directly from the server. Both of these actions can be performed by expanding the tree in the left column, selecting local volume, and going to the ISO Images tab. At the top of the menu, two buttons will appear, Upload (for uploading from your computer) and Download from URL (for downloading directly from the distribution site).
Now we can move on to creating a virtual machine, and the quickest way to do so is to use the blue Create VM button located at the top right of the interface. Proxmox will open the new virtual machine wizard, so let’s go through each step one by one.
-
General: Here we set basic information about the machine. Node is like a cluster to which it belongs. I assume you are at the beginning of the road, so there is a limited choice - one Node to choose from. VM ID is a very important parameter that will be the unique identifier of this machine. Name is, of course, the name of the machine. It is not very important what we enter here, as long as it helps us later to identify which machine we are dealing with. At the beginning of our journey, it is worth creating some naming system that we will appreciate later when we have many virtual machines. We are not interested in Resource Pool at the moment, as we have not configured it yet.
-
OS: We leave Storage as local, which means that images are searched on the local disk. As for ISO image, we indicate the system image downloaded earlier. It is important to correctly specify the Type and Version parameters in the Guest OS section, depending on the system we are installing.
-
System: We have nothing to change here, I suggest leaving the default values.
-
Hard Disk: Here we are mainly interested in the Disk size (GiB) parameter, where we specify how much disk space we intend to allocate to this virtual machine. However, it is worth remembering that this value can be easily increased later, while reducing it will be a bigger problem, so it is best to start with the smallest value recommended by the specification of the given distribution (system), and then gradually expand it as the need arises.
-
CPU: Here we set how much computing power we want to assign to this virtual machine. Proxmox offers a division into Sockets and Cores that is not entirely clear to me. I read a bit about it on various forums, and if I remember correctly, Sockets are used only for machines that have more than one processor. I also remember seeing a formula for calculating the optimal Cores setting, which involved entering the number of cores and threads of our server processor and relating it to the hardware requirements we intend to set for the virtual machine. However, in practice, I only operate the Cores parameter here, and I know that for a 4-core processor, I can set this value in the range of 1-4. However, the good advice here is to do the same as with the disk space Disk size defined in the previous point. It’s always best to assign only one core and modify this value later if you notice the need. The difference is that changing the number of assigned cores has no limits, i.e., it can be done easily both up and down. In theory, I see even the possibility of doing this while the machine is running, but common sense tells me not to do so. It’s always better to stop the machine, change the settings, and restart it with new resources.
-
Memory: Here, of course, we have settings related to operating memory (RAM). We have one parameter to set, Memory (MiB), which is the amount of assigned RAM. This parameter can be changed as easily as the CPU settings, and the value of 2048 is an excellent starting point.
-
Network: Nothing more than network settings. For the purposes of this post, let’s leave everything default, but I would like to point out that there are many other options here that need to be adapted to the specific solution. We can completely cut off network access to this virtual machine. We can separate virtual machines from each other or from the management interface. In general, this is more complex topic, which I don’t want to focus on in this post.
-
Confirm: Summary of all settings that need to be checked and finalized by clicking the Finish button.
Immediately after approval on the list on the left, we should see the newly created virtual machine, but it may take a while to start it up and make it usable.
Virtual machine control panel
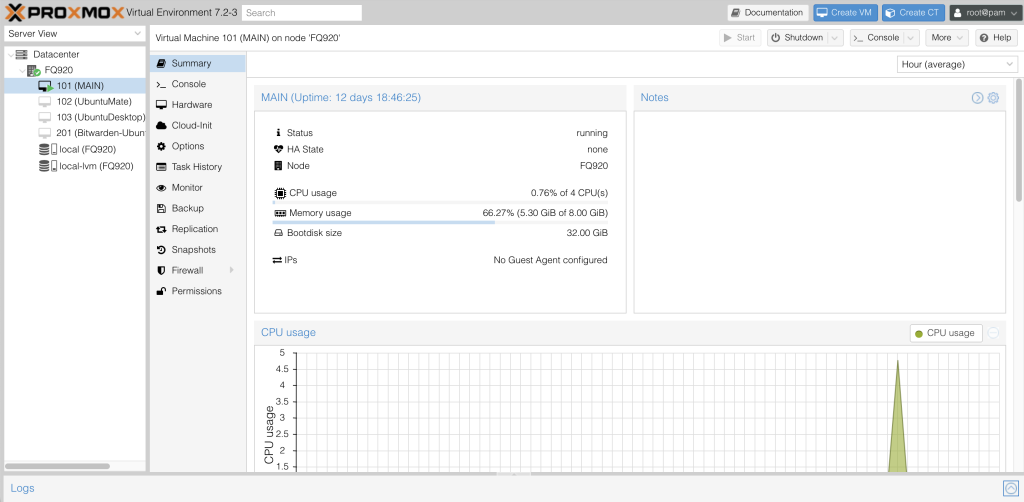
After selecting the machine from the list on the left, the control panel for that machine will be displayed in the main window. Let’s go through all the tabs just as we did for the installation wizard above.
-
Summary: All the key statistics regarding the VM. CPU, memory and disk usage, as well as network traffic. We can also add notes.
-
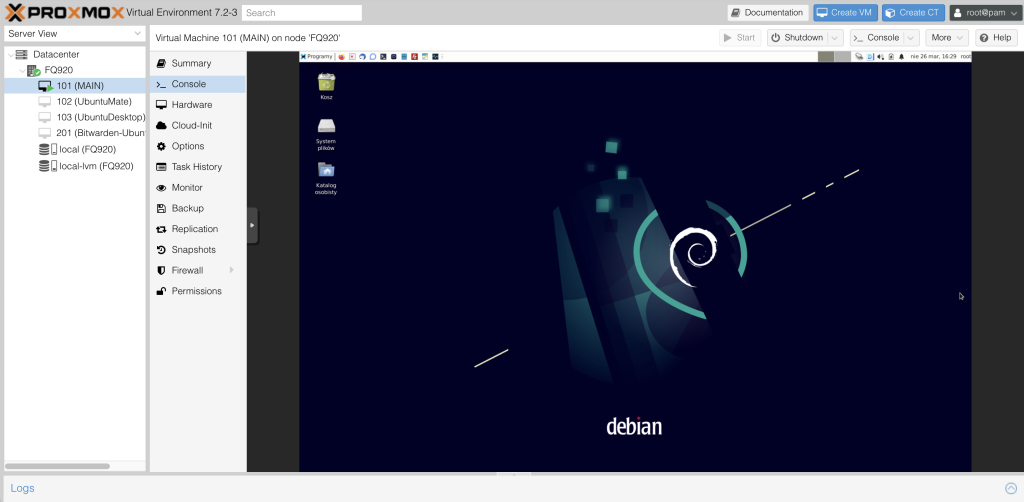
Console: As the name suggests, this is the place from which we can communicate with the server directly from the Proxmox environment. If we installed a system with a graphical interface, we can access it here just as if we physically connected a monitor, keyboard, and mouse. If we chose a system without a GUI, a text-based interface (terminal) will be displayed.
-
Hardware: Here, as well as in the Options tab, we can change what was set up during the creation of the machine. Additionally, it is important to note that we can manage data media here, which means simulating connecting a portable memory or inserting a CD-ROM into the machine.
-
Cloud-Init: A tab for more advanced users who manage the entire virtual machine cloud, and this is just another node in it.
-
Options: See point 3 above.
-
Task History: A basic event log that sometimes helps to understand what happened with the machine when, for example, it unexpectedly restarted.
-
Monitor: Honestly, I have never used this tab and I have no idea what it is for.
-
Backup: A super important tab where we can make a complete backup of the machine. In my opinion, this way of making backups is one of the biggest advantages of Proxmox. You don’t have to mess around with any tar -cvpf or similar actions performed on a running system. Here we simply take the entire machine disk, make its clone, and we are ready to move it anywhere.
-
Replication: A tool for replicating (duplicating) data stores between Nodes. This does not apply to us because as I mentioned earlier, we only operate on one Node at the beginner level.
-
Snapshots: What is the difference between snapshots and backups? A backup is a complete copy of a machine, which contains all of its data, whereas a snapshot is a restore point of the system, meaning a set of information about the state of the machine at the time it was created. It is a very fast and low-invasive way of protecting yourself from making significant changes to the machine whose effect is not entirely known or predictable. Before making such a change, it is always a good idea to take a snapshot, which will allow you to return to that point at any time and either start over or completely abandon those changes.
-
Firewall: Network firewall settings. I have not yet determined whether this is an additional layer or whether it is at the same level as, for example, ufw running on a virtual machine.
-
Permissions: Proxmox is an environment in which more than one user can work. In this tab, you can assign access to a specific user or group of users for a given machine. An additional option is also to provide access through the API based on Token authentication.
Summary
As you probably noticed, dear Reader, Proxmox is a truly powerful and very extensive tool. It allows for configuration of an incredible number of parameters and the creation of truly powerful network solutions based on virtualization. What I have shown in my two posts is only a fraction of what can be done with this environment. I am not an expert in this field myself and I must admit honestly that I cannot do much more in it than what I have described. Nevertheless, Proxmox is definitely my number one solution for a home server. It is stable enough to allow me to run really important services with a clear conscience. It can also be used at the same time as a homelab, i.e., a home experimental playground, where you can quickly create test machines as well as destroy them when they are no longer needed.


