![Portainer - GUI for Docker [ENG 🇬🇧]](/images/portainer.png)
🇵🇱 Przejdź do polskiej wersji tego wpisu / Go to polish version of this post
Table of contents:
- Docker environment installation - short version
- How to run Portainer
- How to launch a sample container
- Accessing Nextcloud from the Internet
For all Readers of this blog, Docker should be familiar, as I extensively covered it in this post. However, today I will take it a step further and introduce a tool called Portainer, which is a kind of graphical interface that makes managing Docker containers more enjoyable and intuitive. Interestingly, Portainer runs as a container itself - one ring container to rule them all!
Docker environment installation - short version
As I mentioned earlier, I discussed Docker in detail in this post, but here I will briefly remind you how to do it by listing the necessary commands.
sudo apt install docker.io -y
sudo groupadd docker
sudo usermod -aG docker $USER
How to run Portainer
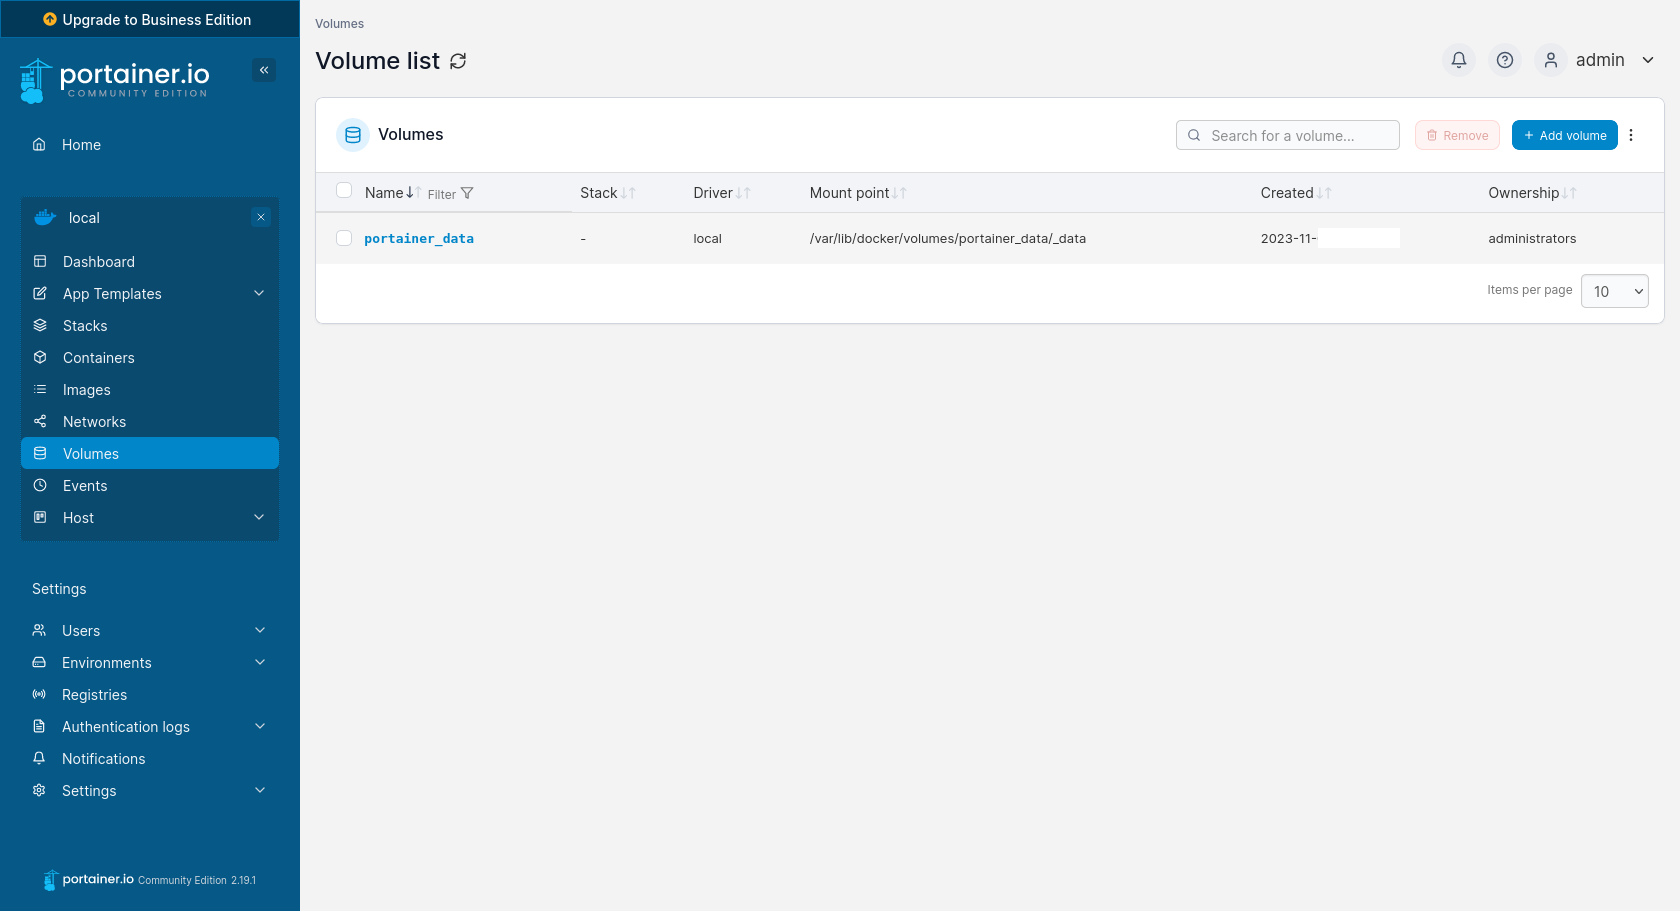
As mentioned before, you run Portainer as a regular container, so let’s start by creating a volume dedicated to it. We’ll call it portainer_data.
docker volume create portainer_data
We will use an image in the CE (Community Edition) version available on Docker Hub. For your convenience, I have prepared a ready-made command that will correctly launch a properly configured container with a running Portainer.
docker run -d \
-p 8000:8000 \
-p 9443:9443 \
-v /var/run/docker.sock:/var/run/docker.sock \
-v portainer_data:/data \
--name Portainer \
--restart unless-stopped \
portainer/portainer-ce:latest
Let’s go briefly line by line to describe what we are actually doing with this command. We start with a simple command to run the container in detached mode, hence the -d flag, which, in simple terms, runs the container in the background and keeps it running. Next, we bind (redirect traffic) ports 8000 (HTTP) and 9443 (HTTPS) between the container and the machine on which it is running. The access panel to Portainer will be located under these ports. It is important to note that if we want external access, i.e., from the Internet or in any other way outside the local network or even the machine on which it is running, we must unlock the ports on both the server (e.g., in iptables) and the router and/or other infrastructure where it operates (I’m looking towards Oracle’s Virtual Cloud Networks). Moving on, we define two volumes. The first one mounts the docker.sock file, allowing Portainer to control the entire Docker environment in which it operates and manages. The second is a regular place for Portainer’s files. The last three lines are standard - giving a name to the container, specifying the restart policy (in this case, run until manually stopped), and specifying which image to use.
To execute this command, confirm with ENTER, and after the container is launched, you can go to the browser and enter the following in the address bar:
https://localhost:9443
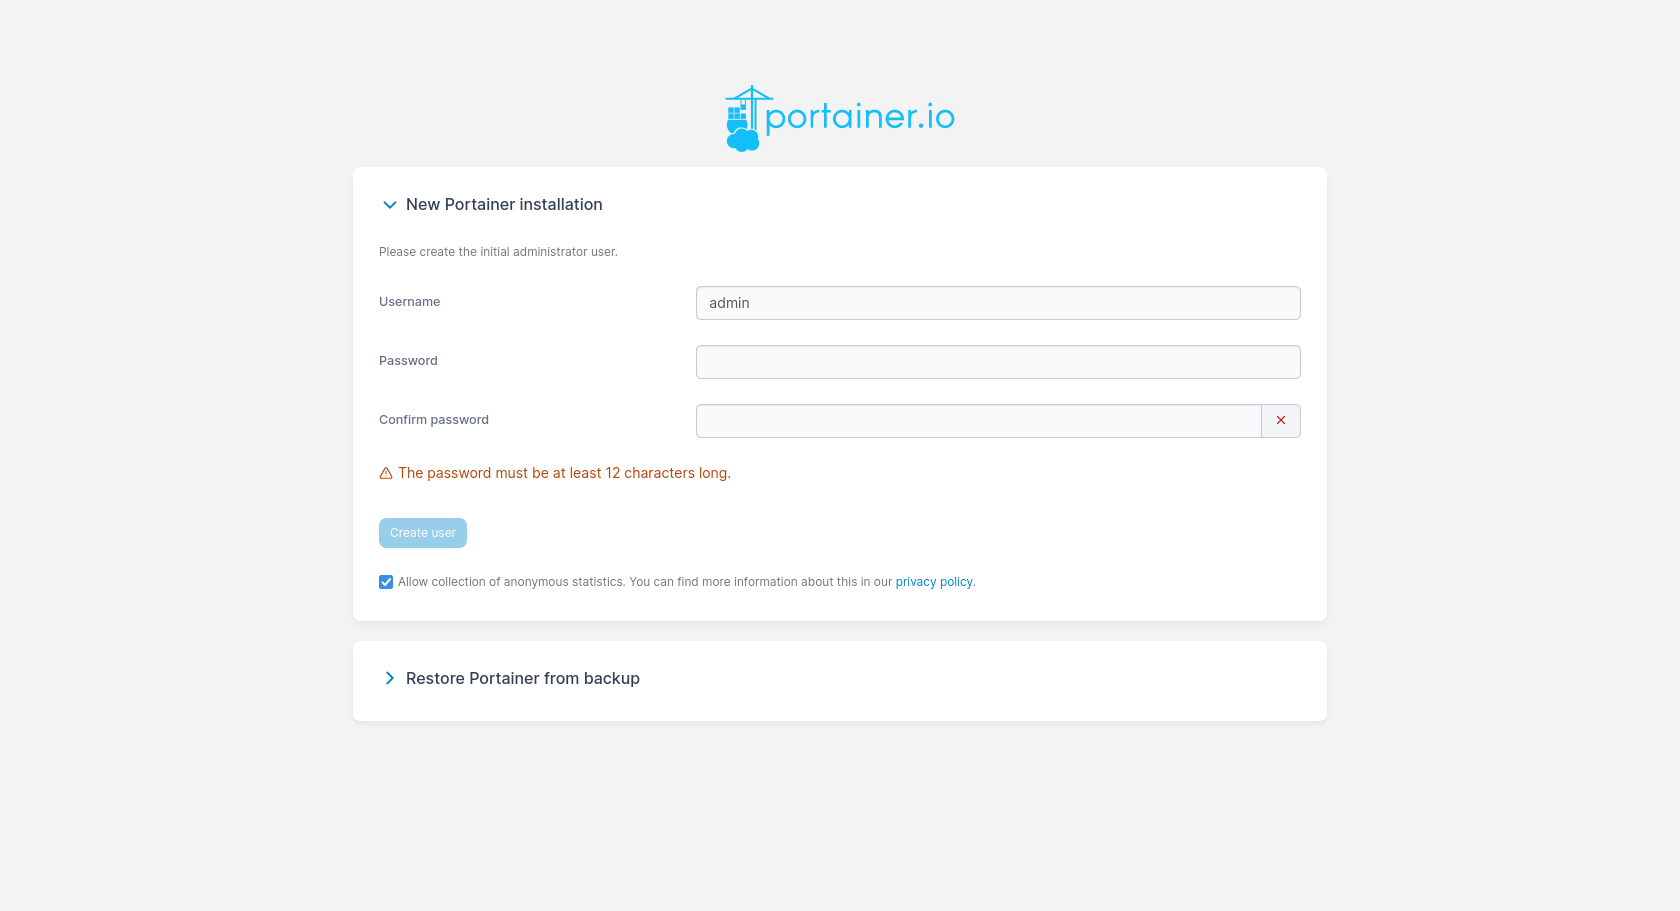
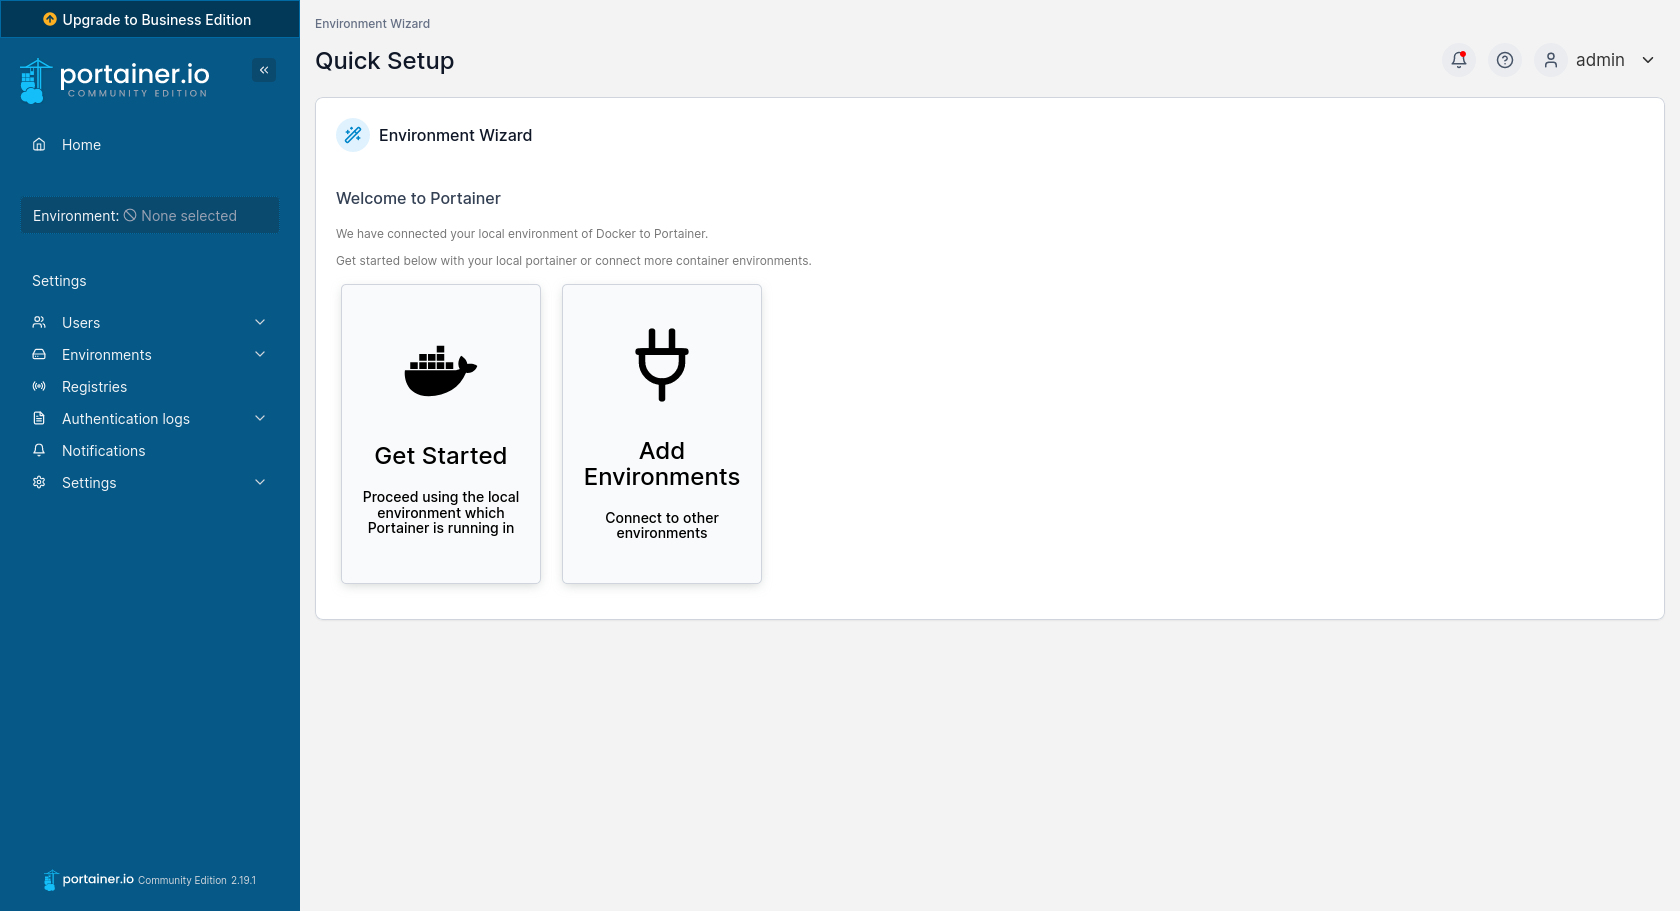
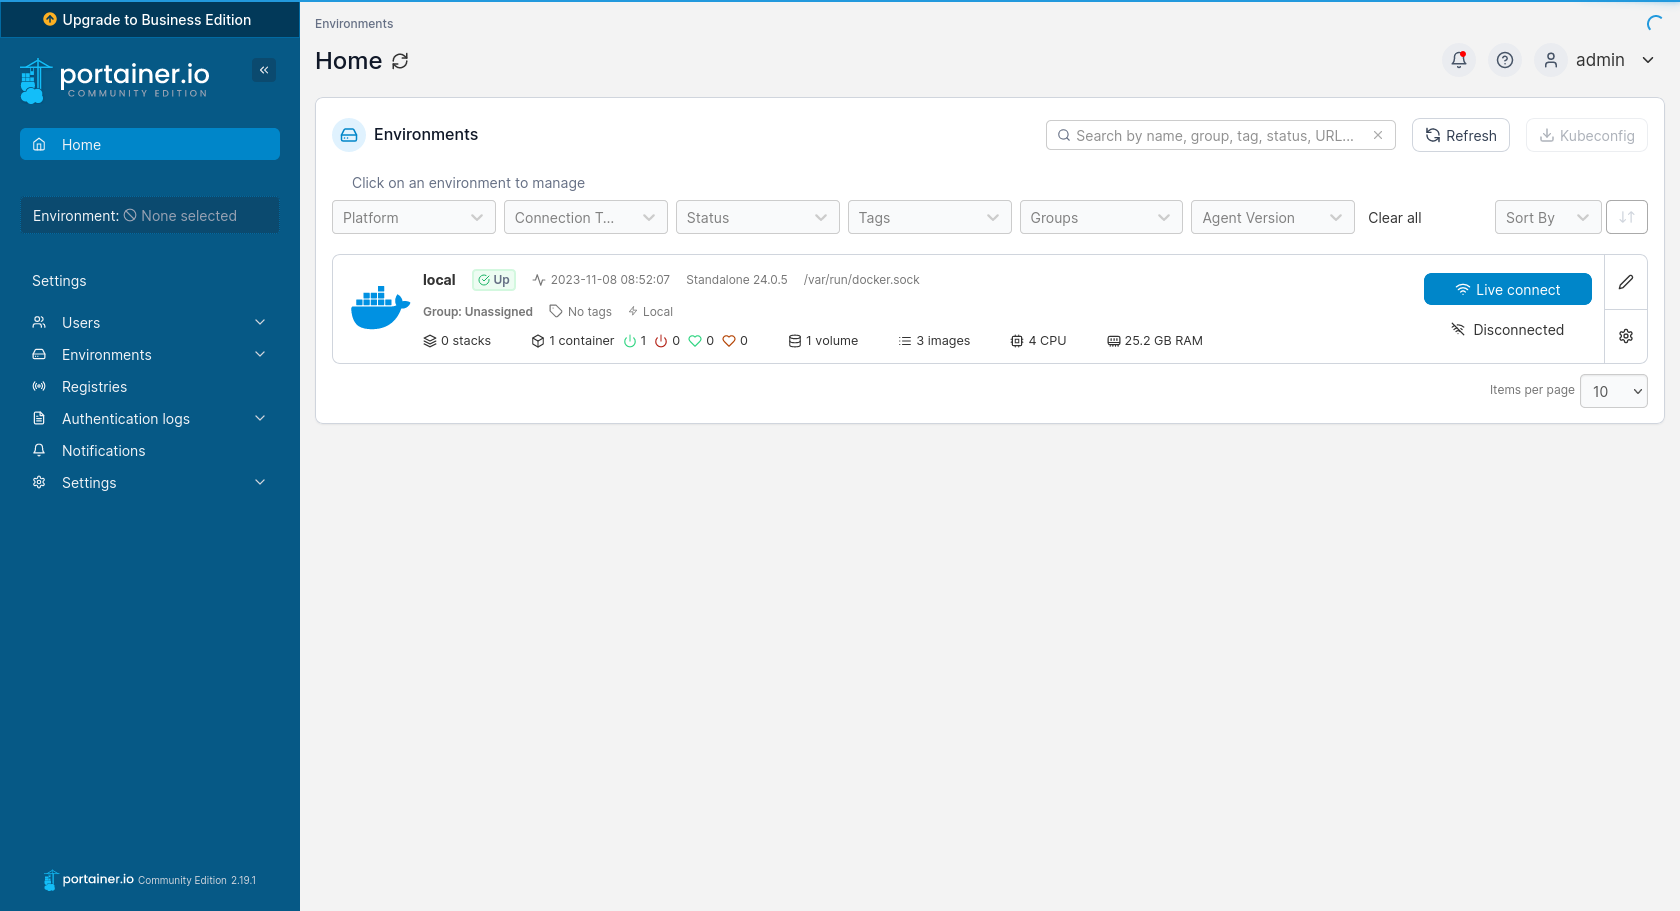
You will see a very simple installer, where you only need to set a name and password for the administrator. On the next page, click the Get Started button, as we want Portainer to use the environment on the local machine on which it is running. Finally, you will be redirected to the list of available environments, where there will be only one named local. To start managing this environment, click the blue Live connect button on the right side. This will result in tabs with management options appearing on the left side, replacing Environment: None selected.
How to launch a sample container
Simply launching Portainer is just the beginning of the fun, and I would feel remiss if I ended the post at this point. Therefore, I will show you how to start a sample container. As a representative example, I have chosen Nextcloud, which I have written about in this post.
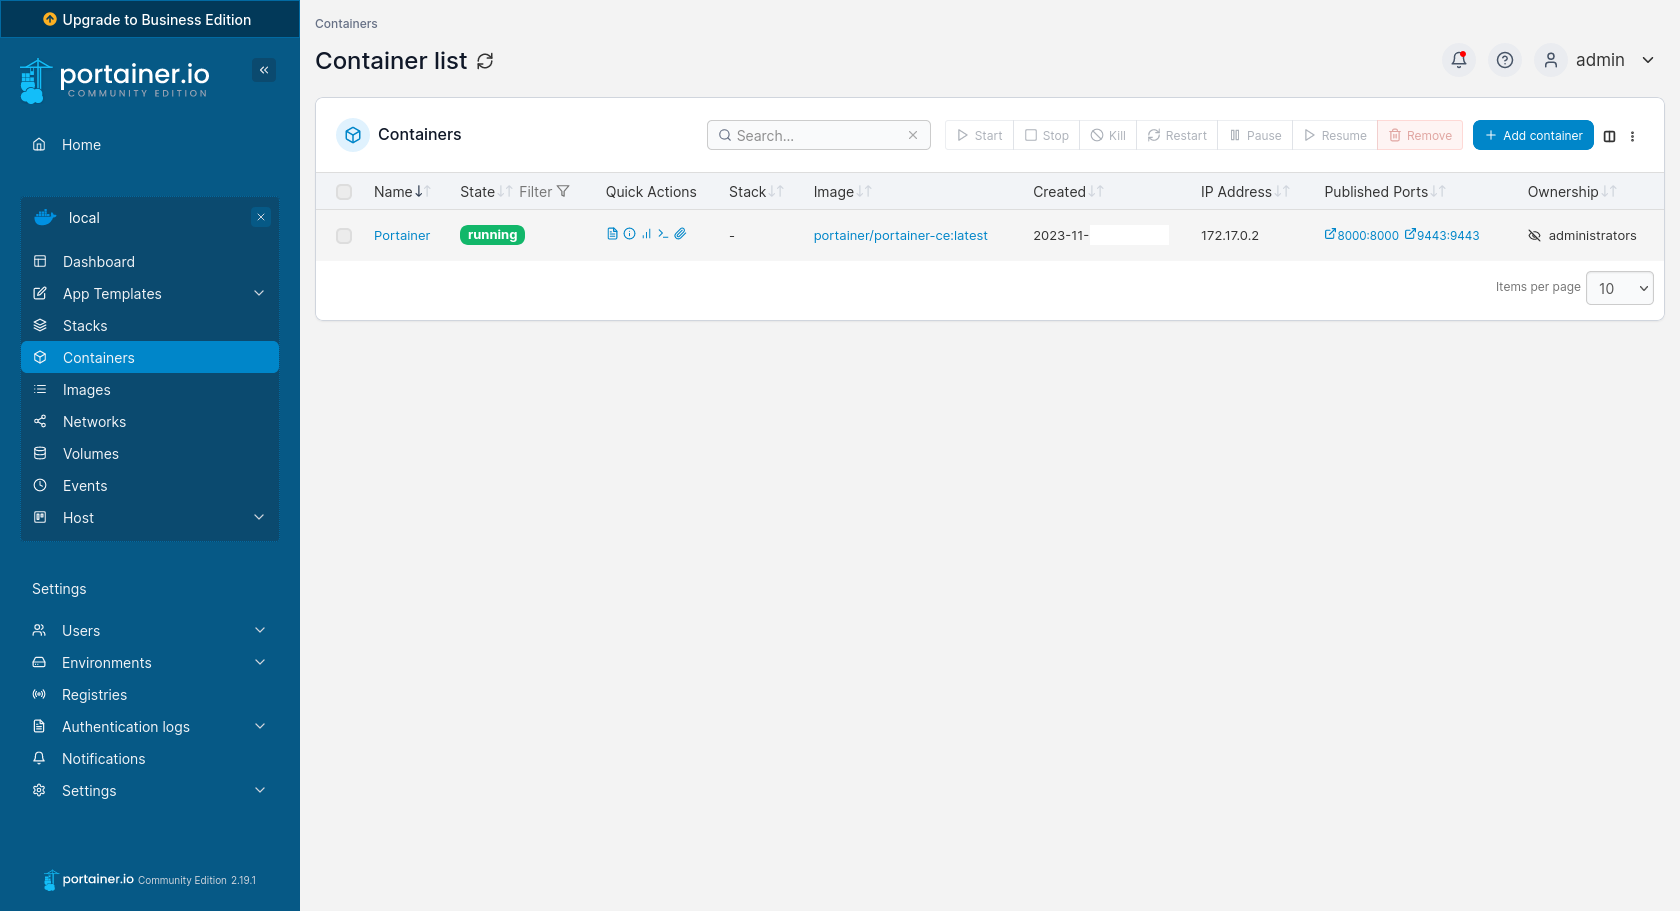
After selecting Environment - local, choose the Containers tab on the left. This is where you will create and list all containers. As you can see, at this point, the only container on the list is Portainer itself. Before attempting to expand this list with another container, we first need to go to the Volumes tab, where we will create two volumes necessary for the proper functioning of Nextcloud.
Using the blue Add volume button located in the top right corner, create volumes nextcloud_config and nextcloud_data. In the volume creator, simply enter the name in the Name field and confirm with the Create new volume button.
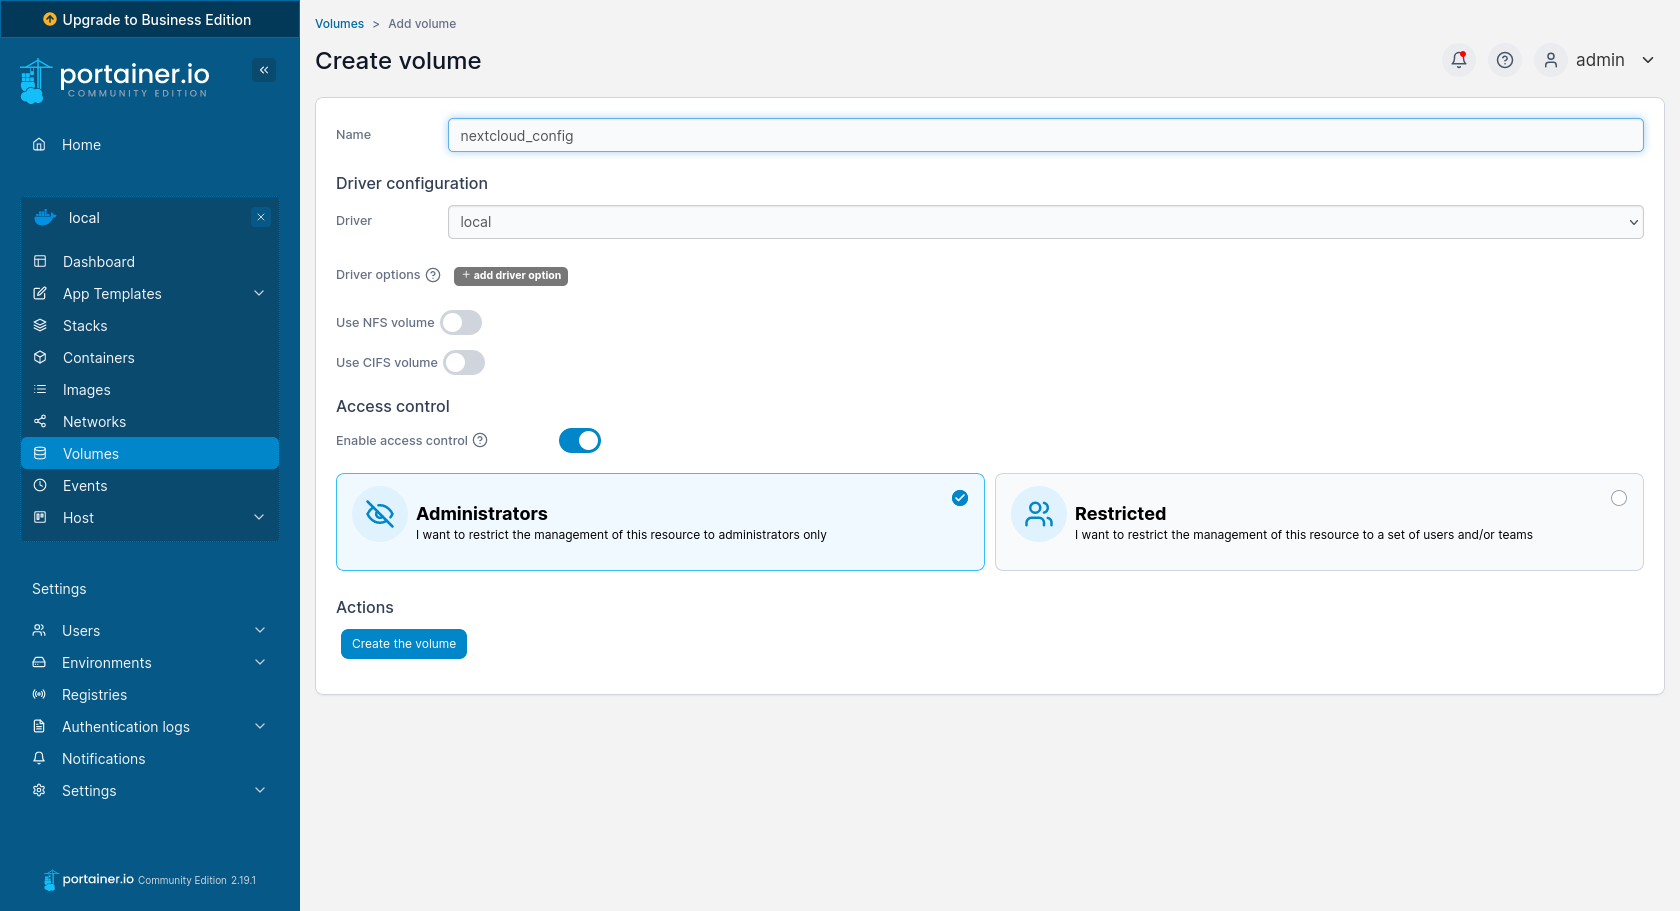
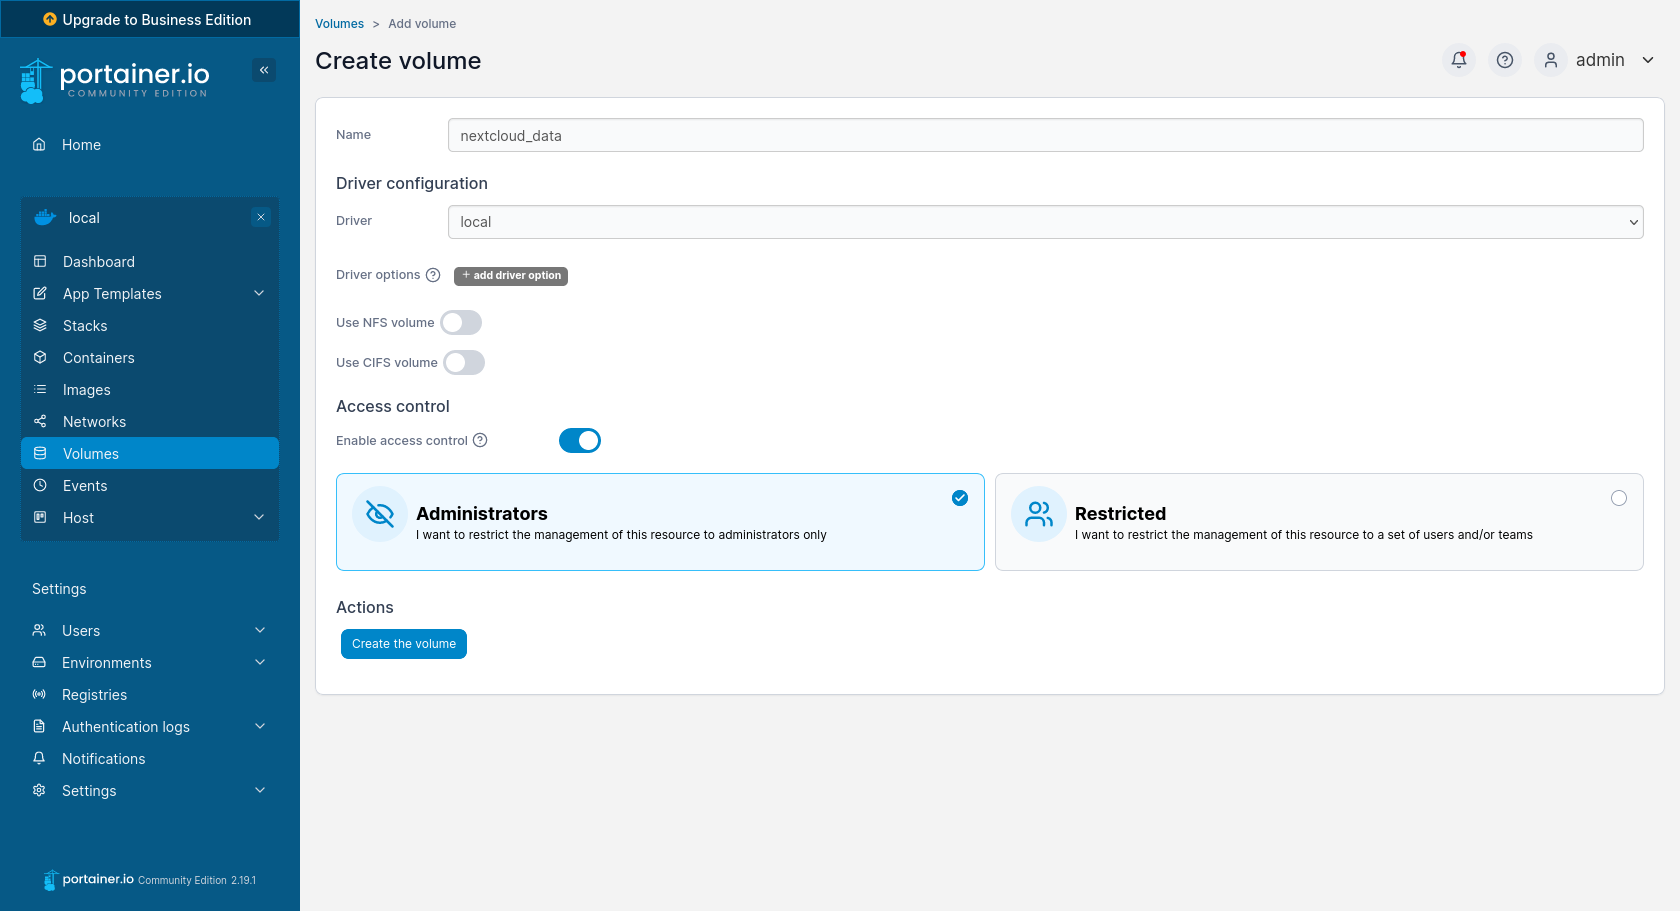
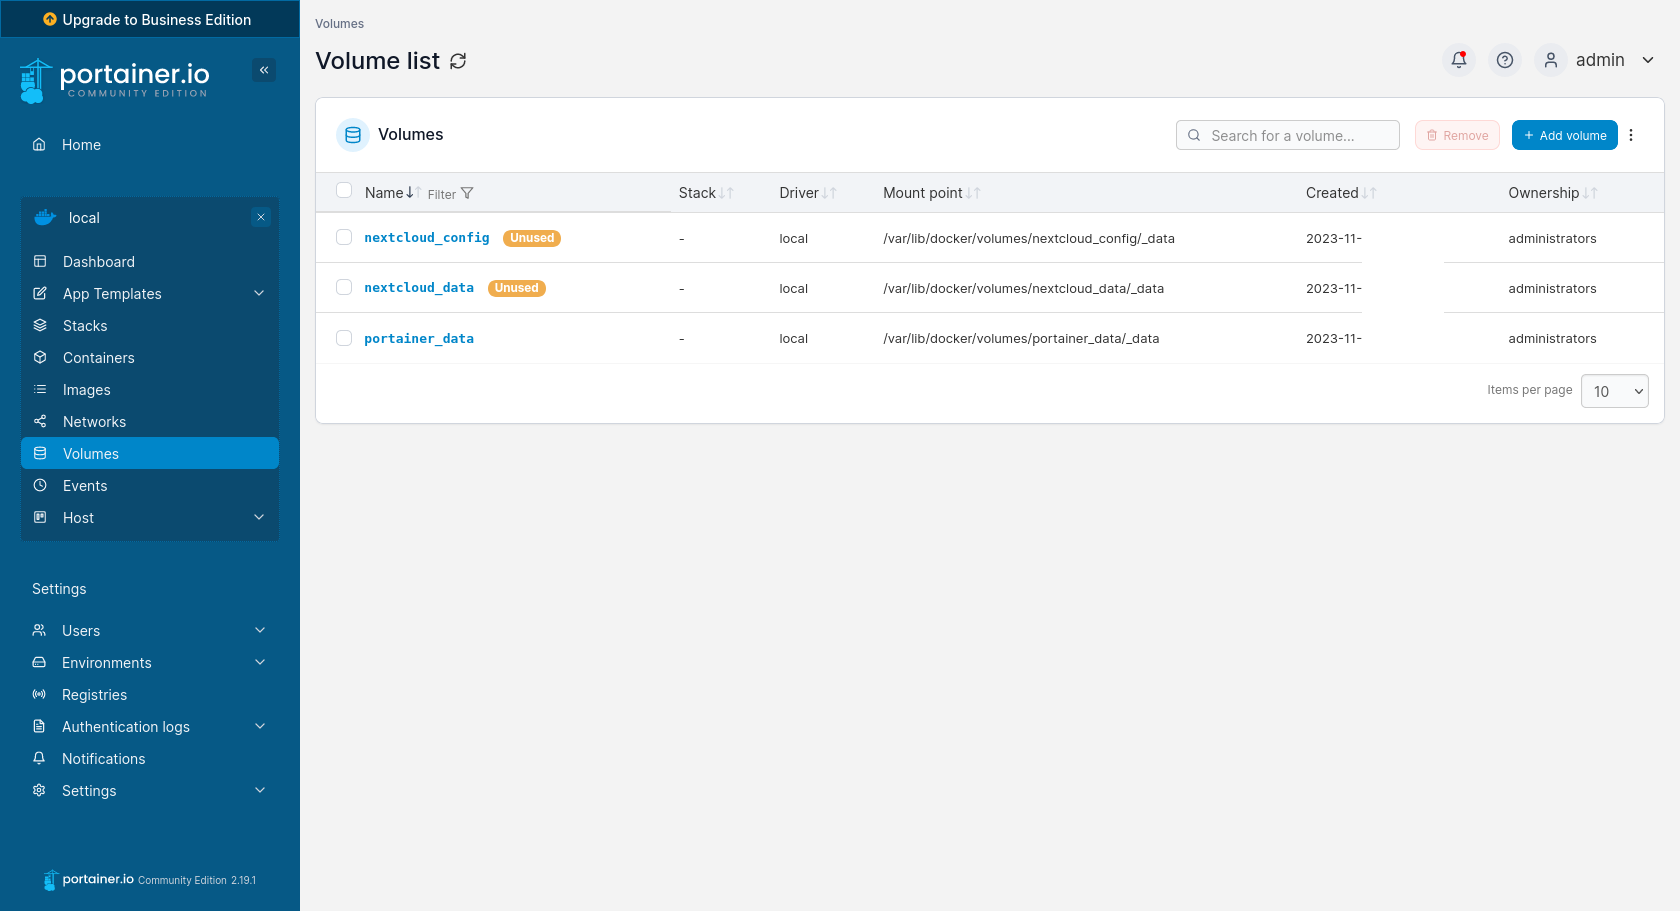
On the Volumes list, two volumes marked with the Unused tag will appear, and their mount points on the server are /var/lib/docker/volumes/(…)/_data. Now that we have prepared a location for the Nextcloud container, we can proceed to create it. Let’s go back to the Containers tab and use the blue Add container button located in the upper right corner. This will open the wizard window, where in the first section at the top, we fill in the fields:
-
Name - Nextcloud
-
Image - lscr.io/linuxserver/nextcloud:latest
-
Manual network port publishing (after pressing the publish a new network port button):
-
host - 443
-
container - 443
-
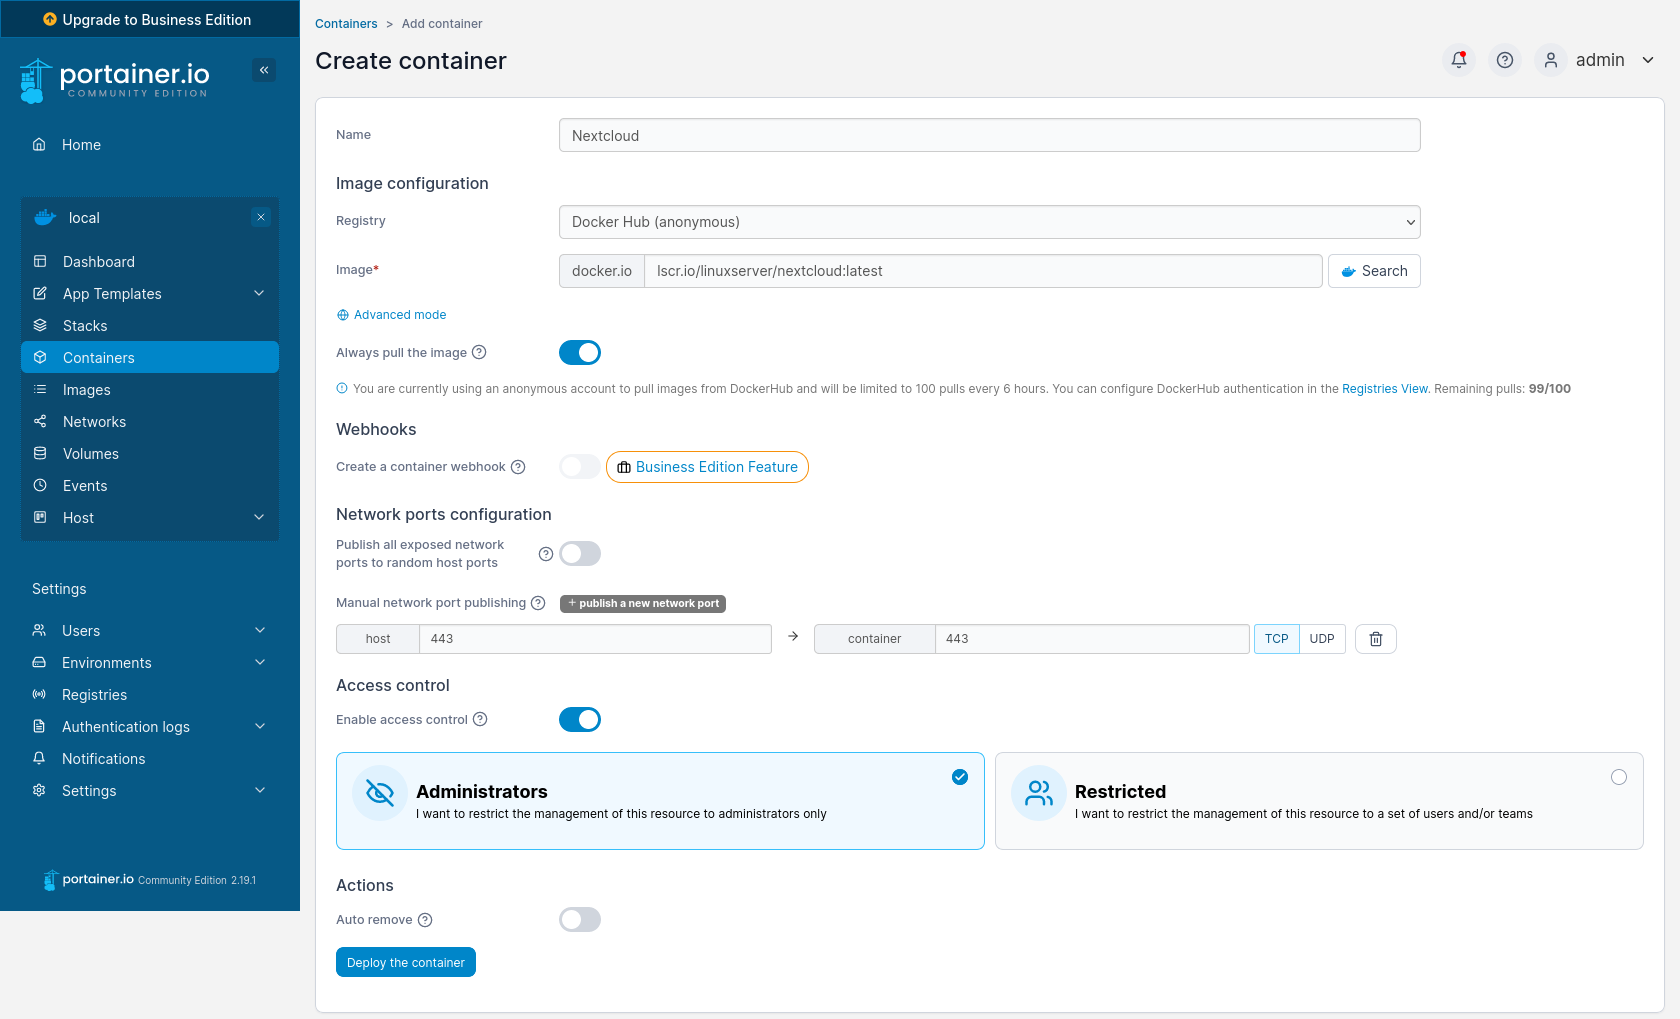
Move on to the bottom section, where we need to go through several tabs. The first one to check is Volumes, where we will attach the volumes created earlier to the container. To do this, press the map additional volume button twice (since we will be configuring two volumes) and map as follows:
| container | volume | |
|---|---|---|
| /config | => | nextcloud_config - local |
| /data | => | nextcloud_data - local |
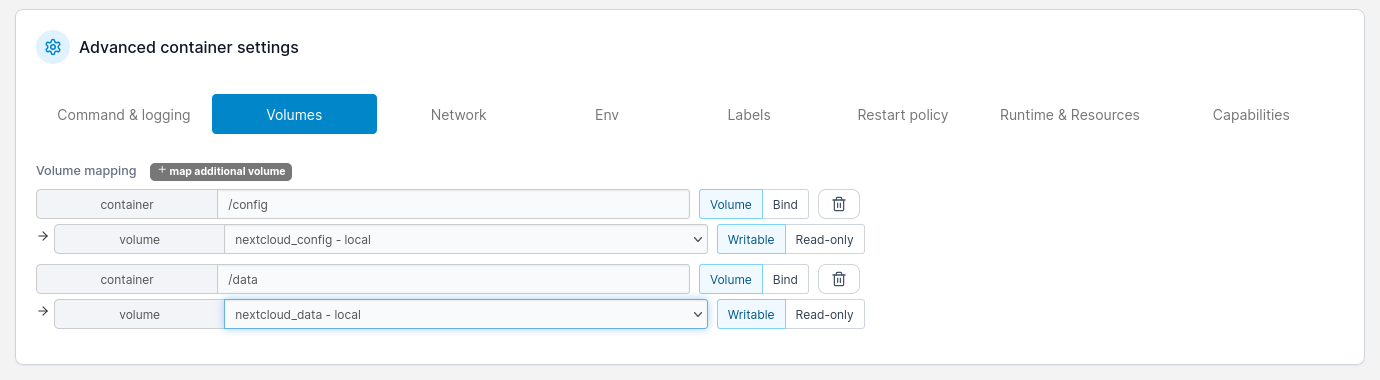
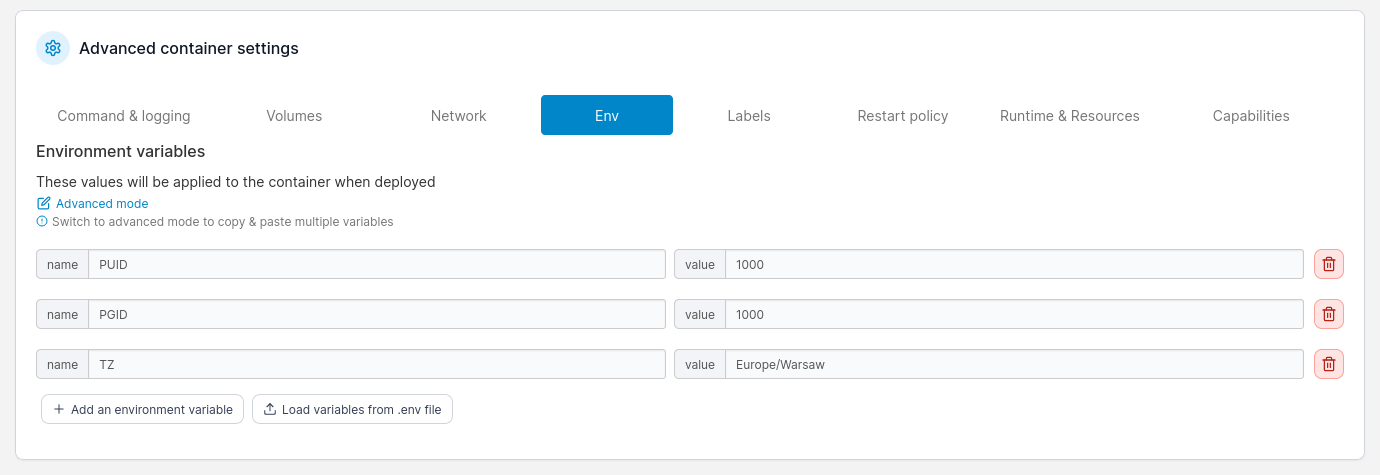
The crucial part here is to ensure that the Volume fields are selected (not Bind) and Writable (not Read-only). The next tab we navigate to is Env, which is an abbreviation for Environment variables. For Nextcloud, we need to set three variables here, so we press the Add an environment variable button three times and enter the following values:
-
PUID - 1000
-
PGID - 1000
-
TZ - Europe/Warsaw
The last tab that interests us at this point is Restart policy, where we choose the Unless stopped option.

Now all that remains is to go back to the top section, where at the end, you’ll find the blue Deploy the container button. This will download the image and launch the properly configured Nextcloud container, as observed in the container list.
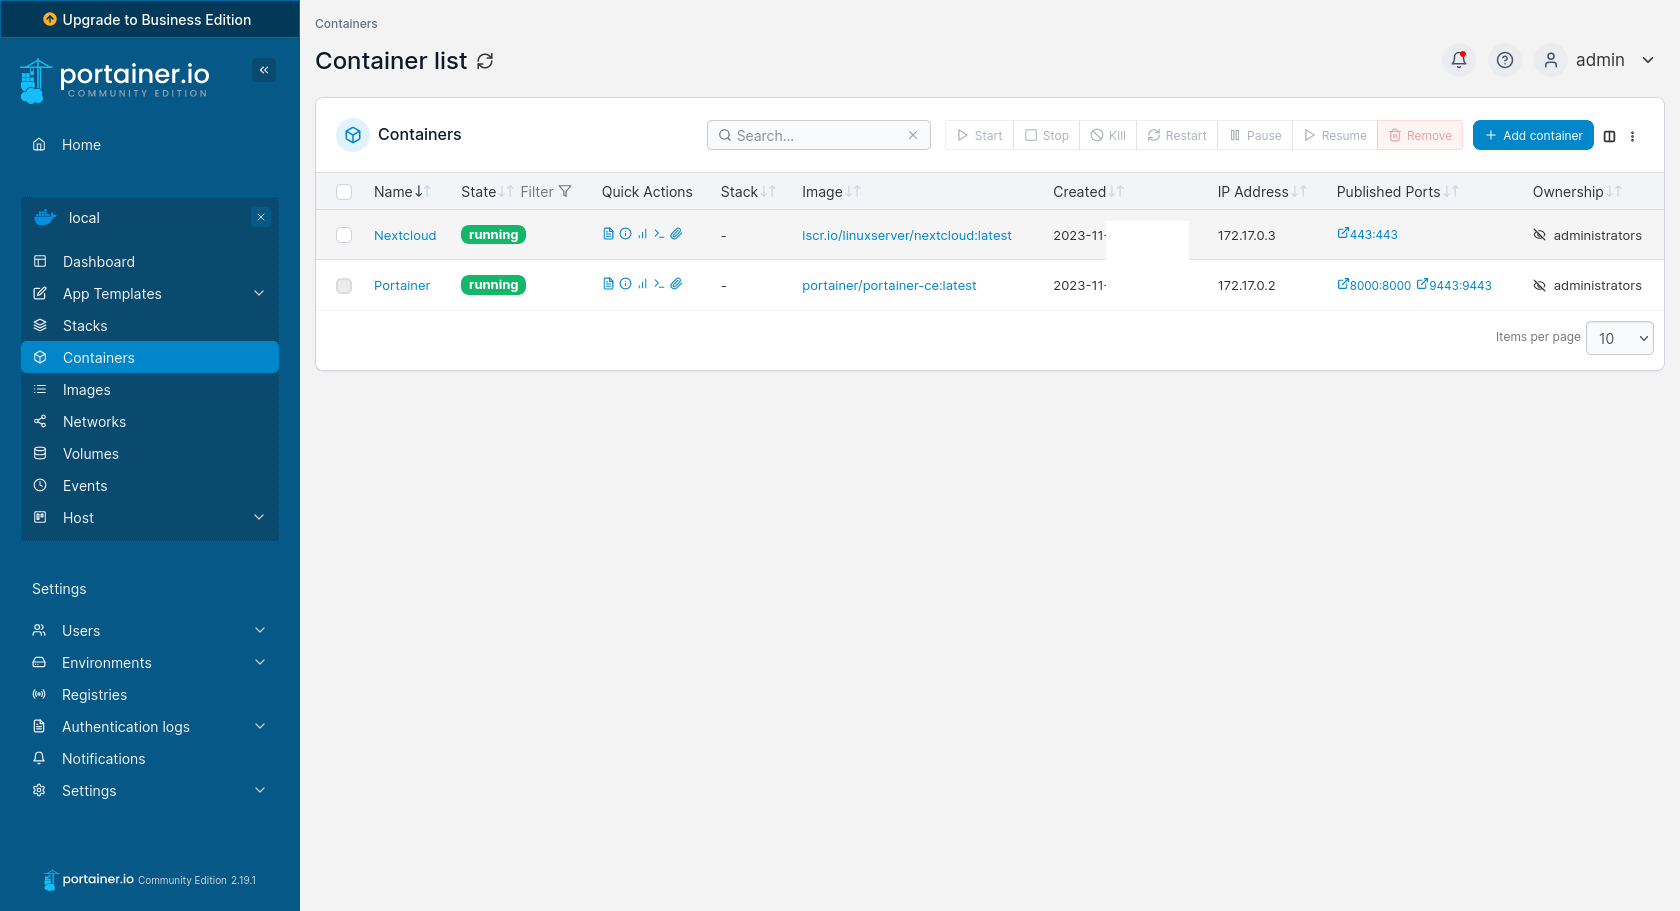
The container is running, so we can open a browser to access the freshly launched Nextcloud. We started it on port 443, which is the default port for HTTPS communication. Therefore, in the browser’s address bar, simply enter the following phrase:
https://localhost
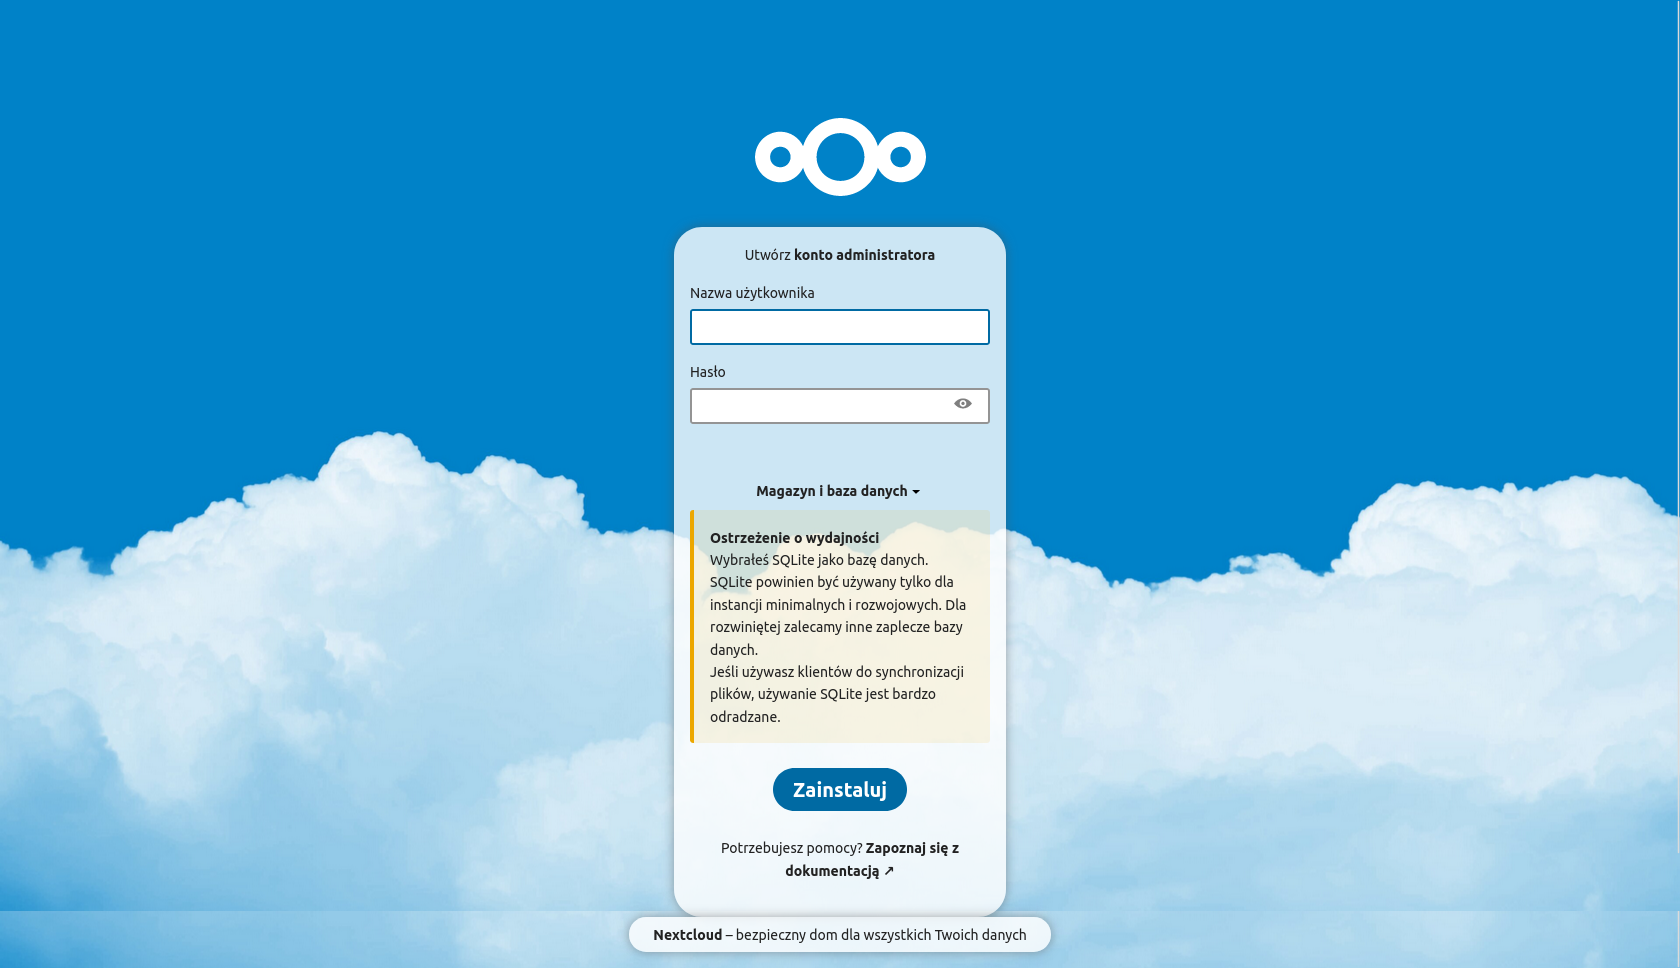
First, we will see the installer where we set the name and password for the administrator and can configure the database. However, in this case, I leave it as default, which uses SQLite because it’s just a solution made only for demonstration. The last thing left to do is press the Install button.
Accessing Nextcloud from the Internet
It was supposed to be a post about the Portainer tool, but I’ll take the opportunity to expand on the Nextcloud topic a bit more. In the previous paragraph, I described how to launch Nextcloud and access it from the local network. But what if we want to access it from the outside?
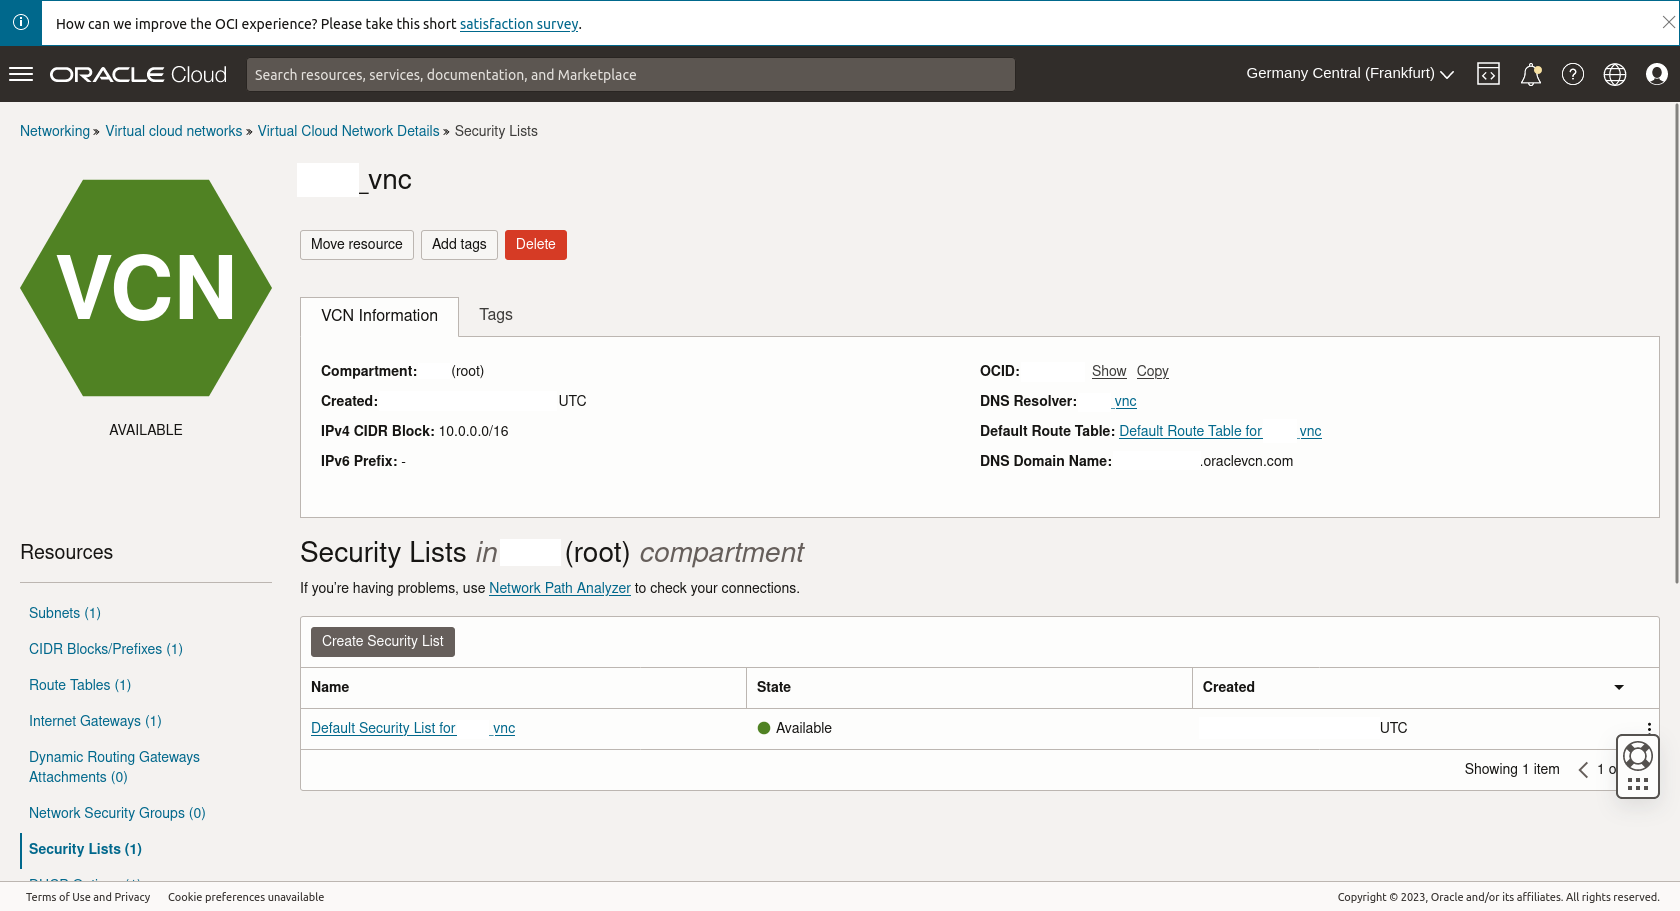
If you are using a VPS from Oracle, the first step should be to unblock traffic on the Oracle infrastructure level for port 443. This can be done in Networking -> Virtual cloud networks -> select your VPS’s VNC -> Security Lists -> go to the list appropriate for your VPS. You need to add an Ingress Rule similarly to the screenshot below.

The situation looks similar in the case of a home server and a router, whose ports need to be opened as it is the main gateway in the home network.
Next, you need to connect to the server via SSH and log in as the root user:
sudo su
Open iptables for editing:
nano /etc/iptables/rules.v4
Locate the line:
(...)
-A INPUT -p tcp -m state --state NEW -m tcp --dport 22 -j ACCEPT
(...)
And right after it, on the next line, paste:
-A INPUT -p tcp -m state --state NEW -m tcp --dport 443 -j ACCEPT
Network traffic has been successfully opened, so the website should be accessible by entering the address:
https://[Server IP Address]
However, most likely, you will see something like this…
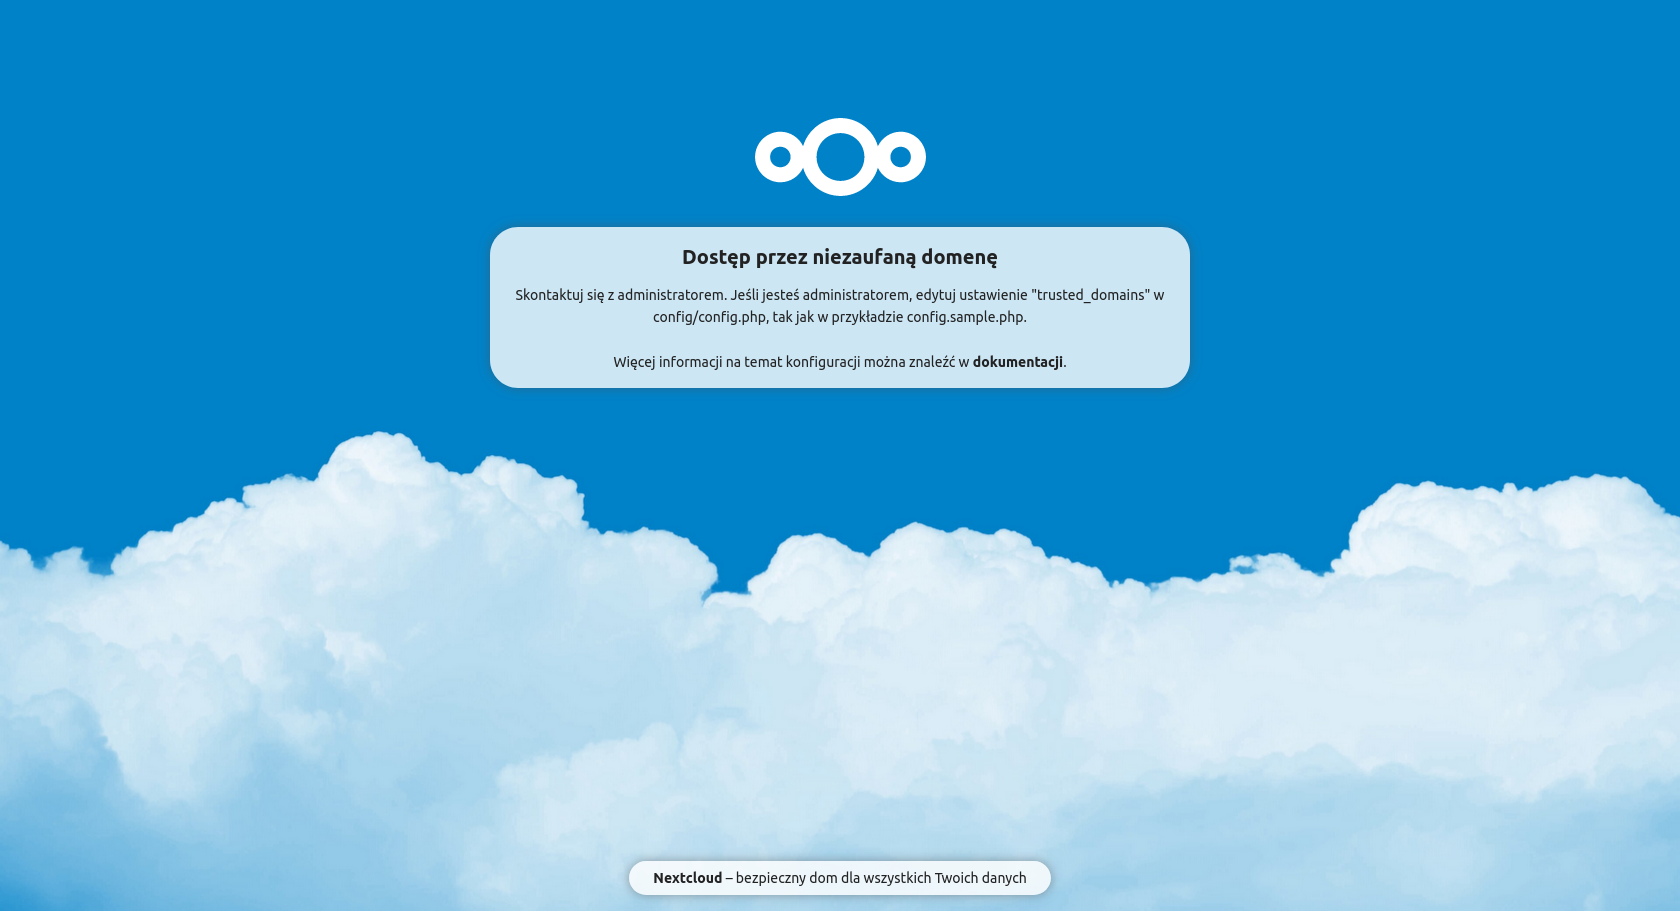
Solving this problem is relatively simple, but finding it is not entirely straightforward, as you need to dig a bit into the documentation. They could have made it much more intuitive… Fortunately, you have me, the guy who has already done all the work and will now present a ready and concise solution. Open the config.php file mentioned in the message in a text editor - location of it is not that obviouscurious about its location, right?
nano /var/lib/docker/volumes/nextcloud_config/_data/www/nextcloud/config/config.php
Locate the trusted_domains section in it and fill it out similarly to this:
(...)
'trusted_domains' =>
    array (
      0 => 'localhost',
      1 => '[VPS IP]',
  ),
(...)
Of course, instead of [VPS IP], you should provide the IP address of your server. After all these steps, you can refresh the page in the browser, and access should be possible.


