![DWService - remote desktop via browser [ENG 🇬🇧]](/images/dwservice.png)
🇵🇱 Przejdź do polskiej wersji tego wpisu / Go to polish version of this post
Table of contents:
- How is it possible through a web browser?
- Account registration and creating an agent
- Consider enabling 2FA
- Agent installation
- Known problem with XWaylands
- Consider supporting the project
I assume that the phrase remote desktop is familiar to anyone. It is a very convenient way to access (control) a computer operating in another part of the world or simply a server operating without peripherals attached. When hearing the term remote desktop, many even non-technical people will surely think of TeamViewer or AnyDesk, but the king in this area is the VNC protocol (short for Virtual Network Computing). There are many programs that operate based on VNC (RealVNC, TightVNC, UltraVNC, TigerVNC, Vinagre, … and many others), and the vast majority of them rely on the need to install two applications - one on the server (the computer we will control) and the other on the client (the computer we will control from). Such tools are a basic working tool for any network administrator consisting of more than one computer, so every beginner starting their adventure as a Sysadmin (system administrator) should at least know what it is.
In this post, I would like to point out one service that, in my opinion, stands out from the crowd by the fact that, firstly, it works through a web browser, secondly, it is free in its basic range (and even paid plans are attractive in terms of price), and thirdly, the source code of the client is available as open-source software. This tool is DWService.net!
How is it possible through a web browser?
As I mentioned earlier, what distinguishes DWService from the competition is the interface that works through any ordinary web browser. Of course, there is a need to install a special agent (client) on the computer/server that we will control, but the actual control from another device is done entirely using the web interface, without the need to install any additional software.
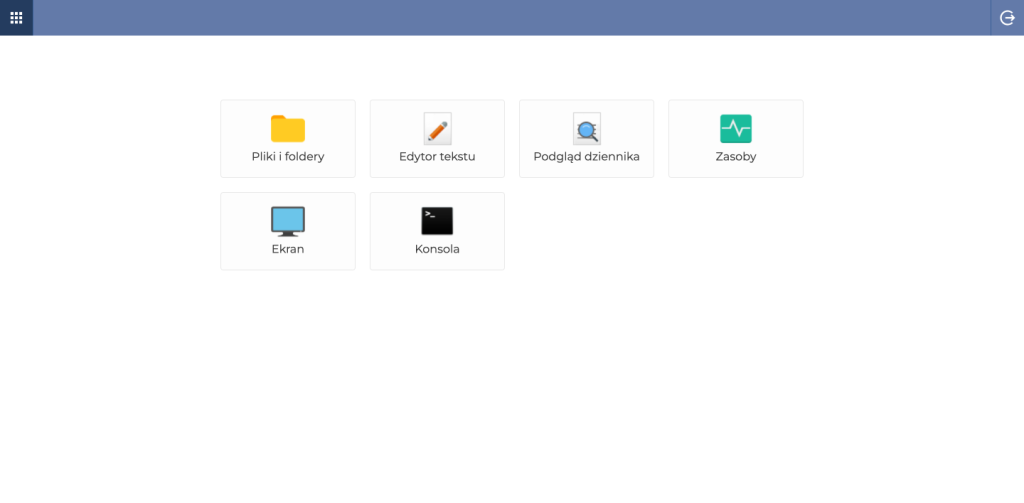
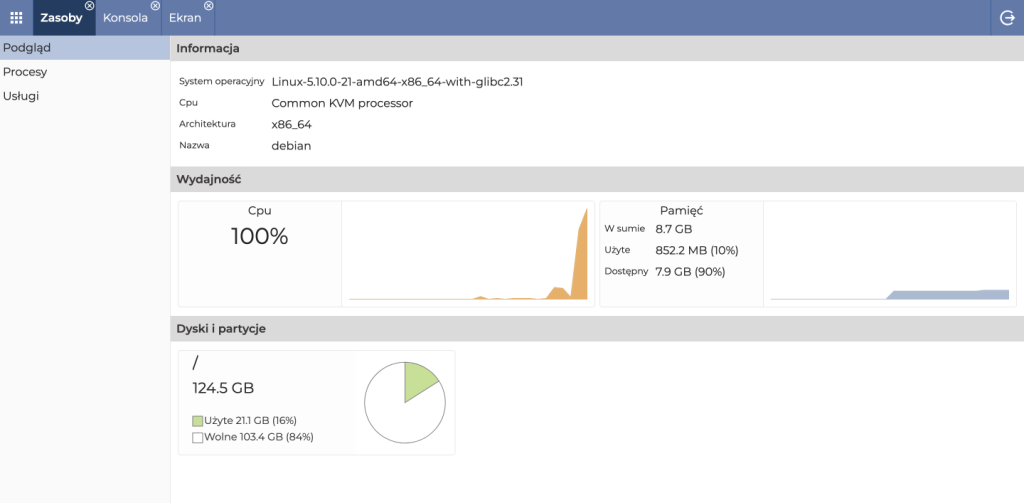
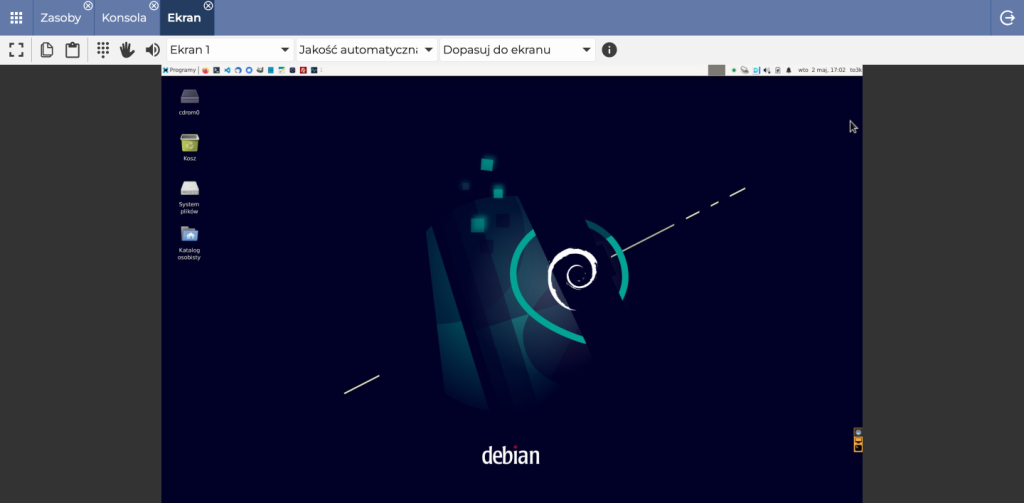
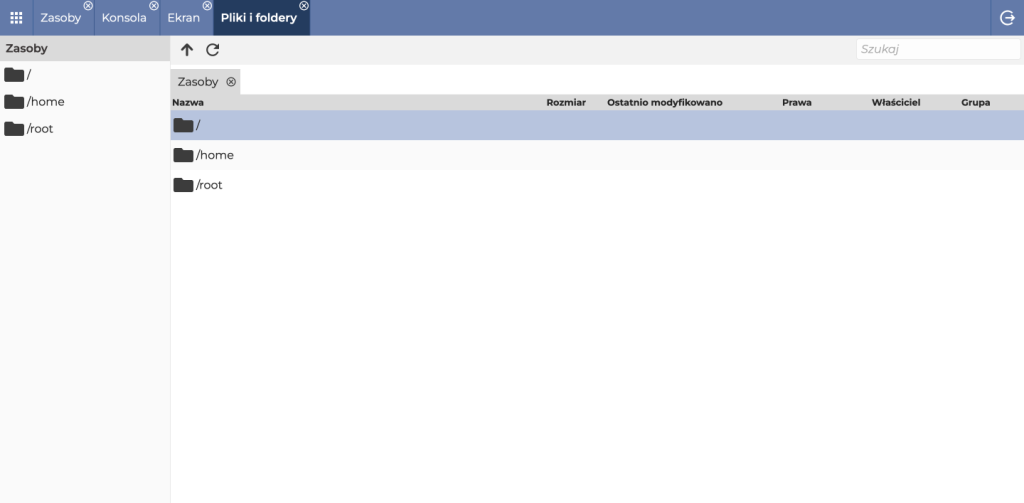
Below are a few screenshots showing what it looks like for one of my servers:

Account registration and creating an agent
Let’s start with creating an account on DWService. After signing up and logging in to the account, we select the Groups button from the menu and find the + button labeled New on the top bar. A simple wizard will appear, in which we only need to enter any name for our first group in the Name field (it could be, for example, Servers). We return to the main menu and this time we choose the Agents button, where we also find the + button labeled New. In this equally simple wizard, we choose the previously created group and enter a name for the agent that we will install shortly. After creating a new agent, it will appear on the list with a 9-digit code on a yellow background. This code is the so-called Installation Code and we will need it during installation, so I recommend saving it somewhere.
Consider enabling 2FA
I recommend securing your account with TOTP (Time-based One-Time Password algorithm), which is one of the forms of two-factor authentication. This security measure, which requires an additional one-time code in addition to the login and password when logging in, is used by me wherever possible. I use the Authy application, available on both Android and iOS, to implement this solution. TOTP can be enabled in the My Account tab.
Agent installation
The installation can be done both using a graphical interface and from the terminal. Let’s start by downloading the agent installation script. If you are using a graphical interface, simply go to the website https://www.dwservice.net/pl/download.html and download the installer for your system. For installation via the CLI, first navigate to the appropriate folder:
cd /usr/src
Next, download the installation script using wget:
wget https://www.dwservice.net/download/dwagent.sh
We still need to give the downloaded script permission to run:
chmod +x dwagent.sh
It’s time to run the script. From now on, all actions will be practically identical for the graphical and CLI installation variants.
./dwagent.sh
First, we will be asked what action we want to perform. We have the following options:
-
Install - standard installation,
-
Run - one-time run,
-
I do not accept - this option is for those who have read the license agreement, terms of use, and privacy policy, do not agree with them, and want to opt-out.
We choose Install, so we type 1 on the keyboard and continue with ENTER.
1. Install
2. Run
3. I do not accept
Option (3): 1
Next, we will be asked to specify the path where the agent should be installed. The default suggested path is /usr/share/dwagent, which is fine for us, so we don’t change anything and confirm with ENTER. Then we will be asked to confirm this choice, so we type 1 on the keyboard and continue with ENTER.
Select the installation path:
Path (/usr/share/dwagent): [ENTER]
Waiting…
Would you want install DWAgent to '/usr/share/dwagent'?
1. Yes
2. No
Option (2): 1
The last step is to indicate how we want to configure the agent, we choose option 1, which means that we want to use the previously generated code (Installation Code, which was mentioned in the previous chapter), and confirm with ENTER. Then we will be asked to enter this code, so we type it in (including dashes in the appropriate places), which we also confirm with ENTER at the end.
How would you like to configure the agent?
1. Enter the installation code
2. Creating a new agent
Option (1): 1
Waiting…
Enter the installation code
Code: [enter the code from the website]
Done. The agent should now be properly installed, and after refreshing the web interface, we should see green instead of yellow background. Clicking on this agent will take us to the management panel, which I showed in the screenshots above in this post.
Finally, I also recommend cleaning up after installation, which means removing the downloaded installation script, which we will no longer need at this stage:
rm /usr/src/dwagent.sh
Known problem with XWaylands
For some users, attempting to access a remote computer’s screen may result in an error message:
Error: XWayland is not supported.
This is a known problem resulting from the fact that, as the message states, DWService does not work with XWayland. It can be easily resolved by disabling XWayland on the server, and interestingly, this can be done directly from the DWService interface.
Let’s go back to the main agent management menu and click on the Files and folders button. This is nothing more than a file manager where we navigate to the /etc/gdm3/ folder. In this folder, we need to find a file named custom.conf or daemon.conf. Open it in a text editor. Now we need to find a line that looks like this:
#WaylandEnable=false
and remove the # character from the beginning of the line (uncomment this command). After that, save the file and close it. This way we have disabled XWayland.
A quick restart of the machine can be done from the console by using the reboot command or from the DWService Agents list by clicking on the three vertical dots and selecting the Restart system option.
Consider supporting the project
DWService is a really useful tool and offers access to a free plan, which is definitely enough for basic users since the plans differ mainly in the maximum connection bandwidth. The free plan offers 6 Mbps, which is sufficient for streaming the computer’s screen. However, there are paid plans, which are justified by the desire to support the project. I did it myself and to prove it, you can find me on the subscribers list available here (if you want to check me, look for tomaszdunia.pl 😉).


