![Desktop Linux for any Android [ENG 🇬🇧]](/images/termux-proot.png)
🇬🇧->🇵🇱 Przejdź do polskiej wersji tego wpisu / Go to polish version of this post
Table of contents:
- Introduction
- Architecture: What’s happening under the hood?
- Hardware and Software Requirements
- Installation Process
- Summary
- Video
Introduction
Modern smartphones and tablets are powerful computing machines that waste most of their time scrolling through mindless videos. Meanwhile, we carry power comparable to ultrabooks in our pockets. The biggest barrier isn’t the hardware, but the Android operating system, which, while based on the Linux kernel, effectively isolates us from professional tools.
The plan for today is to break that barrier. I will show you how to use the Termux environment, the PRoot layer, and the Termux-X11 graphics server to turn any Android device into a full-fledged Linux workstation with the XFCE desktop. All this without unlocking the bootloader and without voiding your warranty.
Architecture: What’s happening under the hood?
Before we dive into practice, a little theory. This project stands on three pillars.
Termux - the terminal that is a system
Termux is not just a simple terminal app. It is a complete Linux environment running in the Android user space. It has its own package manager pkg, which allows you to install compilers, interpreters, and networking tools. This is where all the magic happens.
PRoot - the safe sandbox
By default, Android does not allow changing the root directory to / or pretending to be a root user. PRoot is a mechanism that intercepts system calls and redirects them so that programs installed inside a container (like Ubuntu or Debian) think they are running on a real, isolated Linux system. This allows for package installation and system management as if you had administrative privileges.
Termux-X11 - next-gen graphics
Traditionally, Linux on Android was associated with slow VNC connections. Termux-X11 changes the game. It is a native display server that communicates directly with the Android system. This gives us near-native fluidity, system clipboard support, proper resolution scaling, and—most importantly—the ability to use hardware acceleration on Snapdragon processors.
Hardware and Software Requirements
Hardware Requirements
- Processor - Snapdragon is best (due to support for Turnip GPU drivers). MediaTek and Google Tensor also work great for development tasks (using software rendering),
- RAM - Minimum 8 GB. VS Code and modern browsers are memory hogs,
- Disk - At least 10-15 GB of free space for the system and project files.
Necessary Applications
The entire process essentially comes down to installing two apps:
- Termux (version 0.118 or newer),
- Termux-X11.
It is recommended not to download them from the Google Play Store, where Termux is available in an outdated version. People recommend F-Droid, but I will consistently recommend Obtainium, and it is the installation process using the latter that I will describe below.
Installation Process
Step 1 - Android Configuration
Android 12 and newer have a mechanism that kills resource-heavy background processes. We need to restrict it:
- Go to Settings -> About Phone, at the very bottom you will find Build Number, tap this field (7 times) until you see the message You are now a developer.
- Go to Settings -> System -> Developer Options, find the Apps section, specifically the option Disable child process restrictions, and turn it on.
Step 2 - Installing Termux and Termux-X11
- If you don’t already have Obtainium, go to the official website, download the APK installation file, and install it on your phone. You may need to grant permission to install apps from third-party (unknown) sources. Additionally, in GrapheneOS, you also need to grant specific app permissions (in this case, the browser) to install other apps. Protip: after installing Obtainium, I recommend revoking this permission from the browser.
- Launch the newly installed Obtainium.
- At the bottom, there is a +Add App button.
- In the App Source URL field, paste the repository address
https://github.com/termux/termux-app, press the Add button. - The Obtainium app should find the appropriate APK file for your phone itself. Just click Install at the bottom.
- We have now installed Termux. For Termux-X11, the process is identical, just paste the repository
https://github.com/termux/termux-x11as the repository address.
Step 3 - Environment Configuration
- Open the Termux app. It looks like a standard terminal but running on a phone.
-
Start by granting it storage permissions:
termux-setup-storage - In the window that pops up, agree to access.
-
Update the packages:
apt update && apt upgrade -y -
Install
git:apt install git -y -
We will now get a ready-made installation script from GitHub by a user named orailnoor:
git clone [https://github.com/orailnoor/termux-linux-setup](https://github.com/orailnoor/termux-linux-setup) -
Enter the downloaded repository:
cd termux-linux-setup/ -
Inside, besides the
README.mdfile, there is atermux-linux-setup.shscript, which we must grant execution permissions to:chmod +x termux-linux-setup.sh -
Run it:
./termux-linux-setup.sh - The launched script will first try to identify which phone it’s running on. As I wrote earlier, it is recommended to have a phone with a Snapdragon processor, specifically an Adreno GPU. However, this is only significant if we wanted to run games on our phone, and I’m not interested in such things. For VS Code and basic work in a graphical environment, it doesn’t have to be this specific processor family supporting hardware acceleration.
- Having said that, we must choose the Desktop Environment we want to use. I recommend choosing XFCE, but everyone can make a choice according to their preferences. So, to choose
XFCEfor example, we must enter the digit 1 from the keyboard and confirm with ENTER. -
This is the moment when we must be patient, as this is the core stage of the script’s work. When it is finished, we will receive a large
INSTALLATION COMPLETE!message, and at the end of it, we will find the most important information for us, i.e., two commands, the first of which starts the environment and the second stops it:TO START THE DESKTOP: ./start-linux.sh TO STOP THE DESKTOP: ./stop-linux.sh
Step 4 - Launching the Graphical Environment
-
According to the hint from the last point of the previous step, type the command in Termux:
./start-linux.sh - Now we can minimize the Termux app and go to Termux-X11.
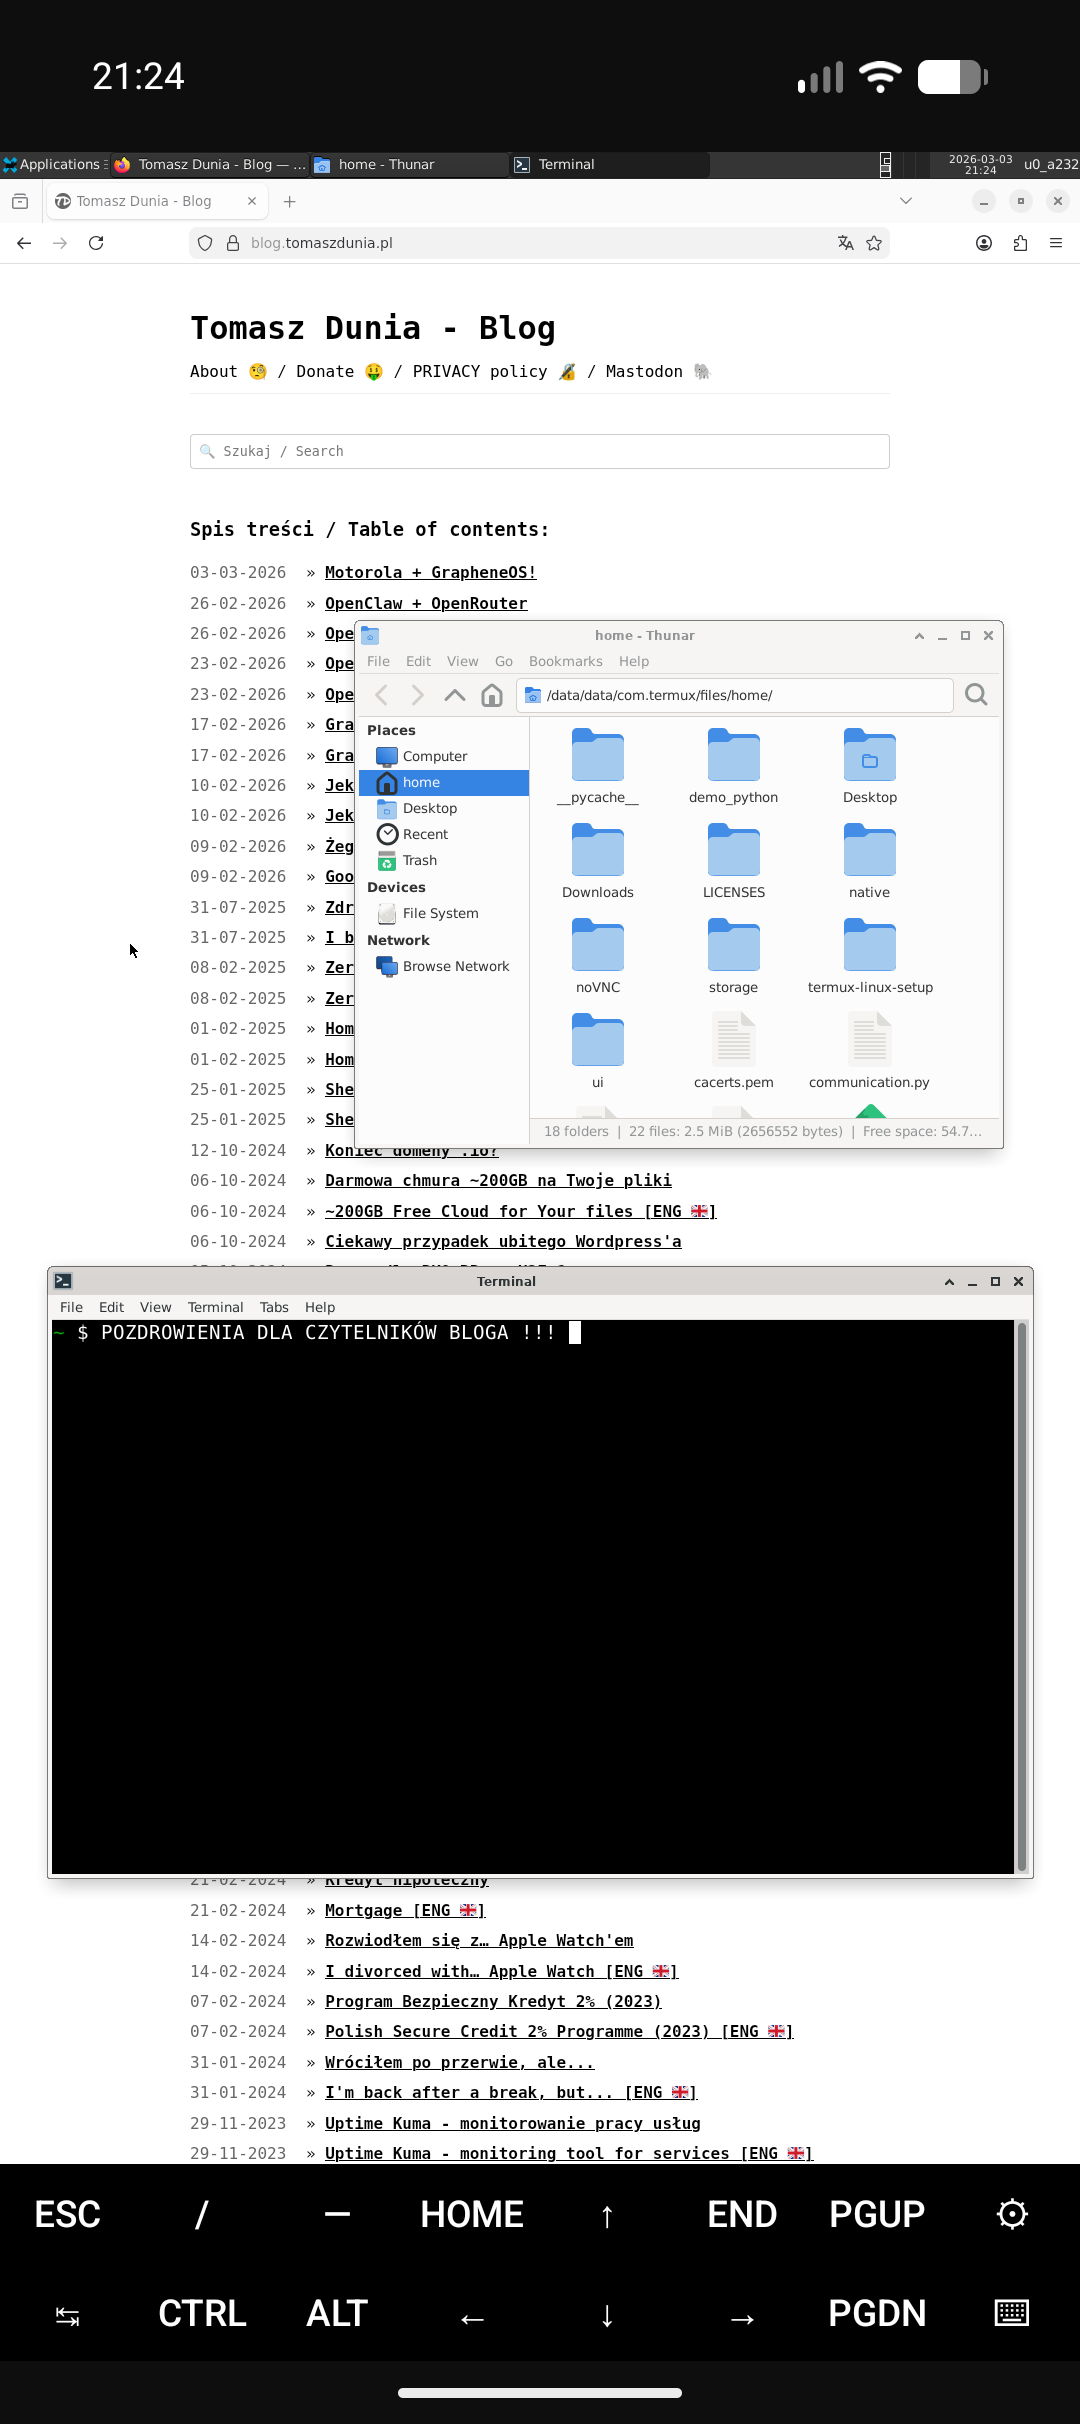
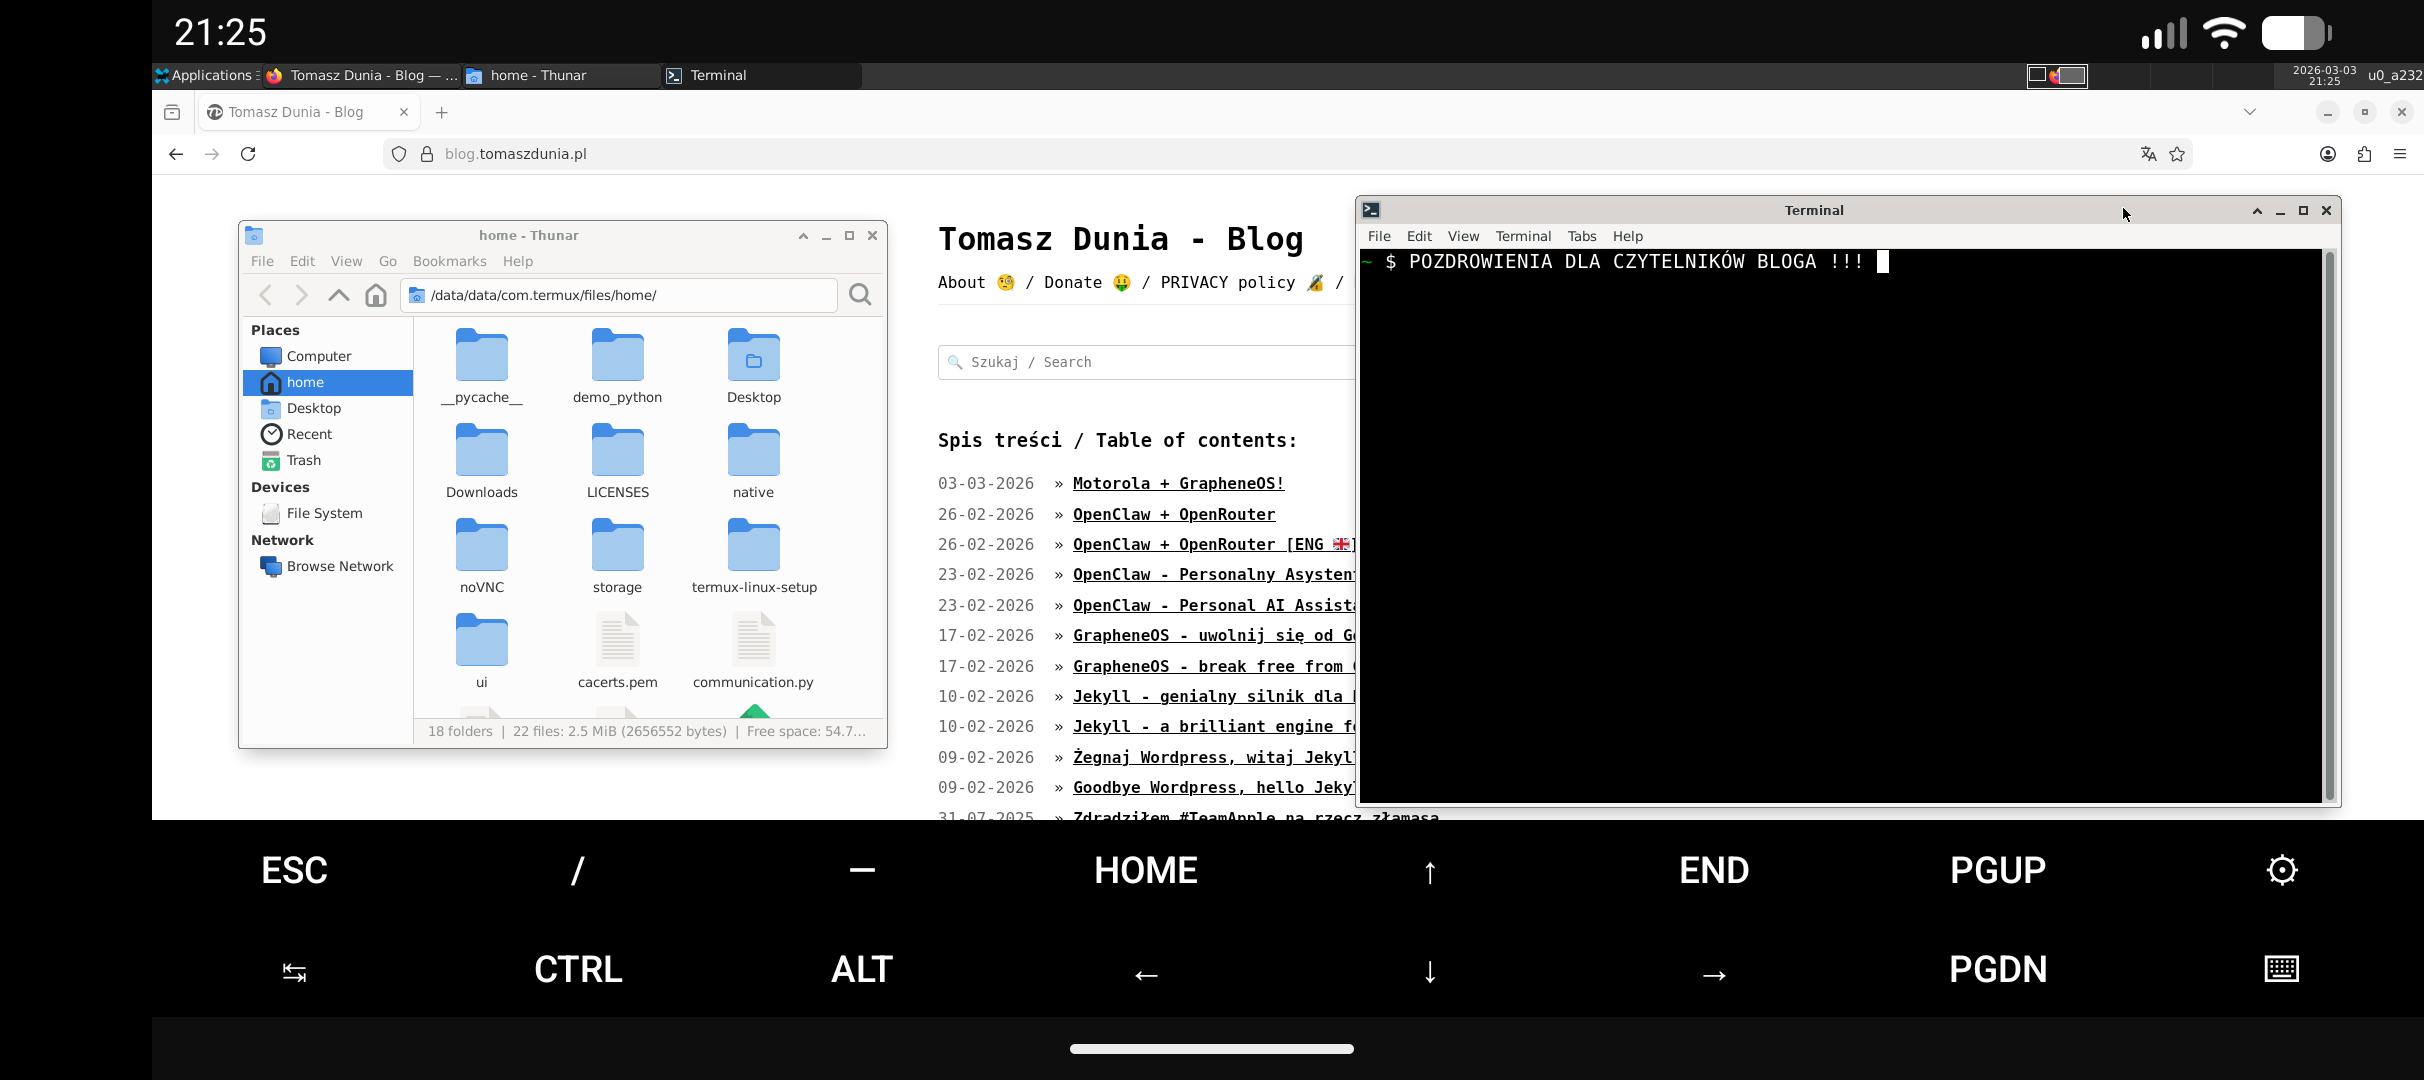
- After literally a moment of waiting, the beautiful XFCE interface desktop should appear!
At the end of this post, I’m attaching a few screenshots showing how it looks on my Pixel 9a. It might not look impressive, but it’s worth noting that this is a screen with a diagonal of only 6.3”. Despite this, I think changing a few settings, especially with proper scaling, would change the situation dramatically, and what matters is how smoothly this environment works. The pre-installed Firefox runs on this without any problems even with several tabs open, and I saw that people install and use programs like GIMP, VS Code, and others without problems. For me - WOW!
Interestingly, Termux-X11 is a regular app, so you can smoothly switch between it and all other applications you have on your phone.
Summary
Many people will ask - okay, but what's this for...?. For me, it is first and foremost a Proof of Concept and an interesting solution. Secondly, I can imagine a quite large number of scenarios where I only have a smartphone with me and it’s necessary to suddenly perform a task that is best, or even only, possible to do in a desktop environment. Thirdly, a monitor and a Bluetooth keyboard and mouse are all you need to create a reasonably comfortable workstation with your entire environment that you have in your pocket - on your smartphone.
After short tests, I started thinking really seriously about getting some reasonably cheap and durable (rugged type) tablet with a large battery and a screen with a diagonal of about 10”. I’ve even already scouted around on the Internet and my attention was caught by the Ulefone Armor Pad 4 Ultra. It sounds exotic, but according to many opinions, it’s quite an interesting piece of equipment, and it can be snatched for about 1300 PLN (already including duty). From China, of course.